

| Last Updated | Changes |
| 9/18/2023 | Updates to Training Data section |
| 3/7/2024 | LoRA Trainer Updates |
| 6/20/2024 | Multi-Training & Minor Updates |
| 9/10/2024 | New Captioning Type – Natural Language |
| 9/12/2024 | Rapid Flux Training! |
| 9/20/2024 | New data set attestations |
| 11/2/2024 | SD 3.5 Medium and Large Training added! |
| 1/9/2025 | New Dataset Upload Options! |
| 4/1/2026 | Updated base model list; added video LoRA training; new training engines |
⚠️ This Guide Has Been Partially Updated
The Civitai LoRA Trainer has expanded significantly since this guide was last fully reviewed. The base model list, video training section, and training engine information below have been updated, but some screenshots and parameter details may not reflect the latest UI. A full content refresh is planned.
Key additions since last update:
- Video LoRA training – Train video LoRAs for Hunyuan, Wan, and LTX2
- New base models – Flux.2 Dev, Flux2 Klein, Illustrious, Chroma, Qwen, ZImage, and more
- AI-Toolkit engine – A new training engine supporting multiple model ecosystems alongside Kohya
What is the Civitai LoRA Trainer?
LoRA model training is a complicated business! There’s the required scripts, the dependencies; Python, Torch 2.0, all the complex terminology, and once you’ve got to grips with that, there’s the hefty hardware requirements! Training Stable Diffusion 1.5 models can be accomplished with a relatively low amount of VRAM (Video Card Memory), but for Flux training you’ll need more than most people can supply!
We’ve sidestepped all of these issues by creating a web-based LoRA trainer!
We want LoRA training to be as accessible as possible, so we’ve made the trainer as simple as we could for new users who may never have trained anything, yet also included advanced options for experienced users.
This Guide will be updated and expanded over time!
Who has Access, & what’s the cost?
The LoRA Trainer is open to all users. Training costs vary by base model – starting from 500 Buzz for SD 1.5 and SDXL models, with more advanced models (Flux, video, etc.) costing more. The exact cost is shown before you submit your training job.
Note that LoRA training jobs with very high Epochs and Repeats will require more Buzz, on a sliding scale, but for 90% of training jobs the cost will be close to the base cost!
How do we access it?
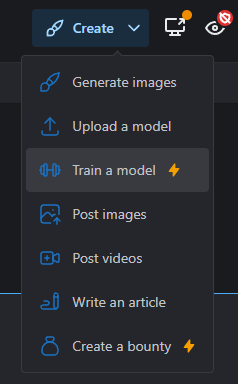
To access the trainer, click on the blue Create icon at the top right of the screen, as if you were going to upload new Content – you’ll see an option to Train a model.
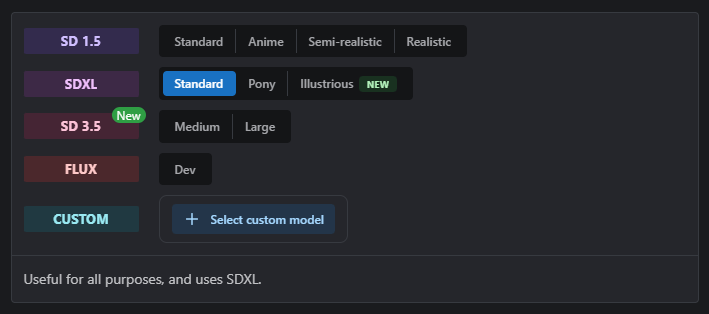
Step 1 – Choosing a model type
From here, the Training Wizard begins, starting with the initial page – the Model Type Selection;

Choosing a model type pre-sets some of the advanced training settings. The model types provide an easy way to set up the configuration for people who’re new to training, but experienced LoRA trainers can tweak these settings before training starts.
Give your model a Name, then click Next to move onto the second step.
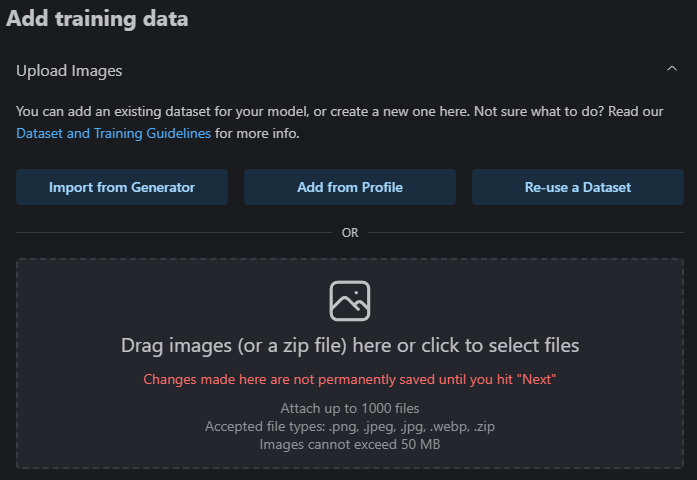
Step 2 – Adding and Captioning Training Data
Now we have to provide our images on which we want to train. There are four options to add training data images! We can use a combination of all four methods to popular our training data images.
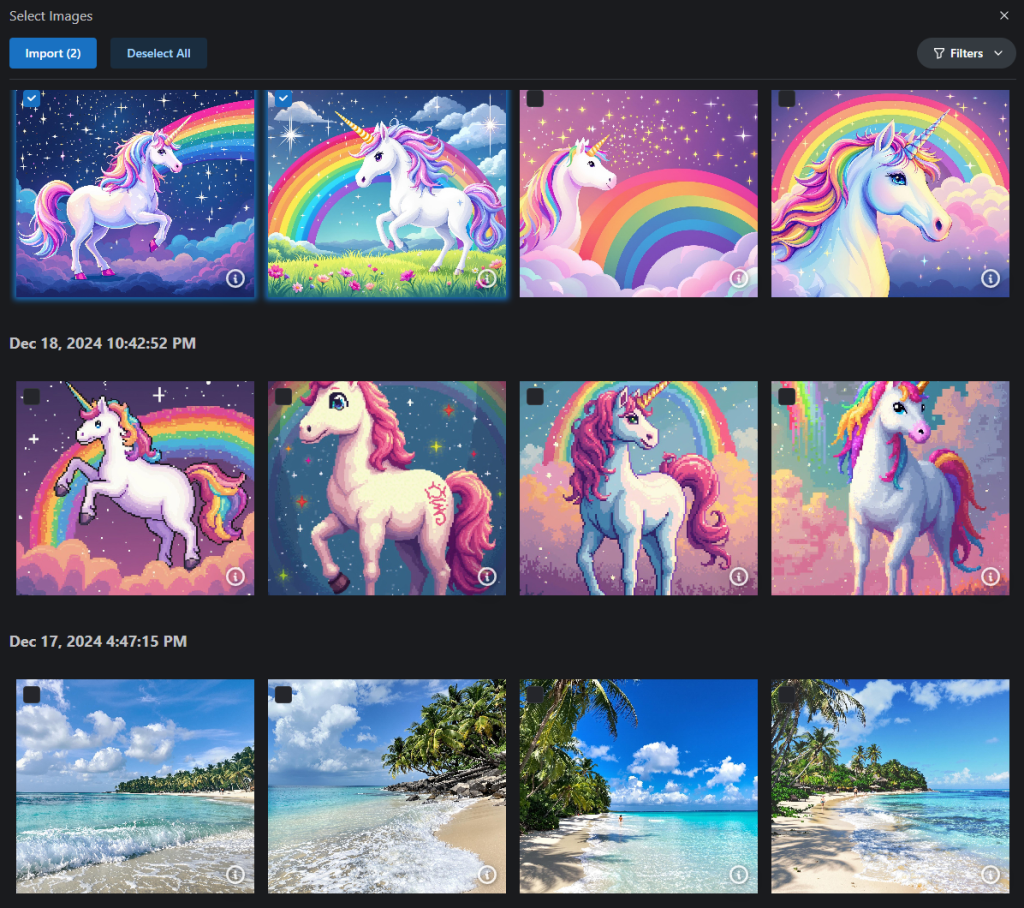
Option 1 – Import from Generator
Import from Generator allows us to select from images previously created in the Civitai Generator, but not yet posted to Civitai. It will show the images grouped by date/time, much like they are in the Queue tab of the Generator.
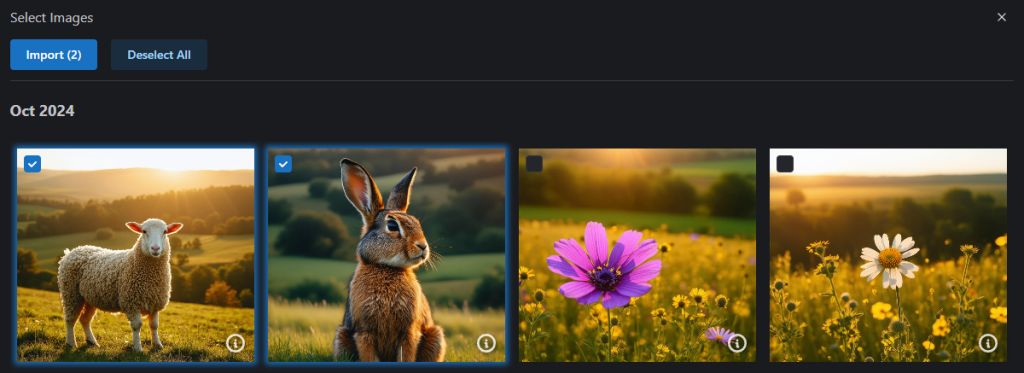
Option 2- Add from Profile
The second option, Add from Profile, allows us to upload images we’ve posted to our Civitai user Profile. Images uploaded to posts which have not yet been published will also show in this view. The images are grouped by month and year.
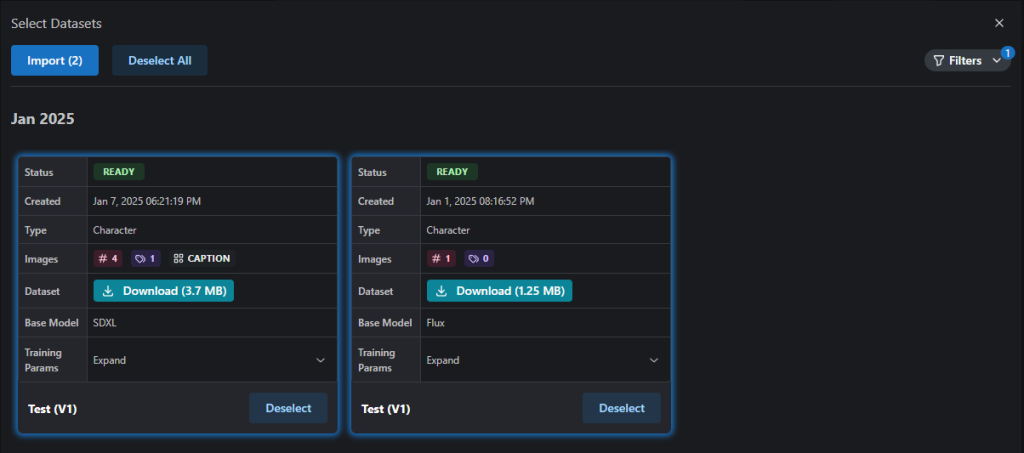
Option 3 – Re-use a Dataset
You can re-use one of your previously created/uploaded datasets using Option 3, Re-use a Dataset! We have amended our Data Retention Policy to allow datasets to be retained for a period of 30 days, for re-use in the LoRA Trainer.
We have provided a number of Filters (top right) to help categorize the datasets by Base Model, Type, Label Type, etc.
Multiple datasets can be imported, with the images and captions from both being appended to any existing images imported via any of the other methods.
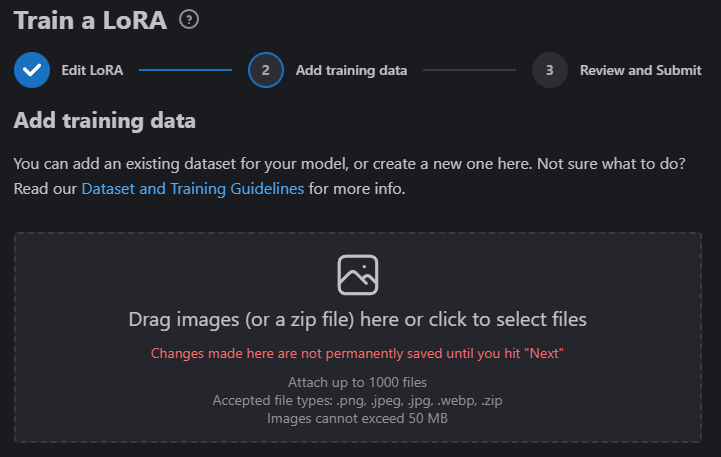
Option 4 – Dragging and dropping (or clicking and selecting from the windows dialog) a zip file of images and corresponding caption.txt files, or even just loose images, into the upload box.
Filename Convention for Zip Files
If you elect to upload an existing dataset manually via the drop box, we ask that you provide the data in a zipped file (.zip extension). The file may include only images, or it may include images and text files which include captions, if you’d like to pre-caption your images.
A directory should contain an image file with a name that matches the caption text file. These will be interpreted as a pair in training.
| Image + Caption Pairs | Image File Name | Caption Text File Name |
|---|---|---|
| Pair One | 1.png | 1.txt |
| Pair Two | 2.png | 2.txt |

Windows users can select the images and text files (or images if intending to use the Auto-Captioning feature), right click, and select “Compress to ZIP file” to prepare a dataset for upload.
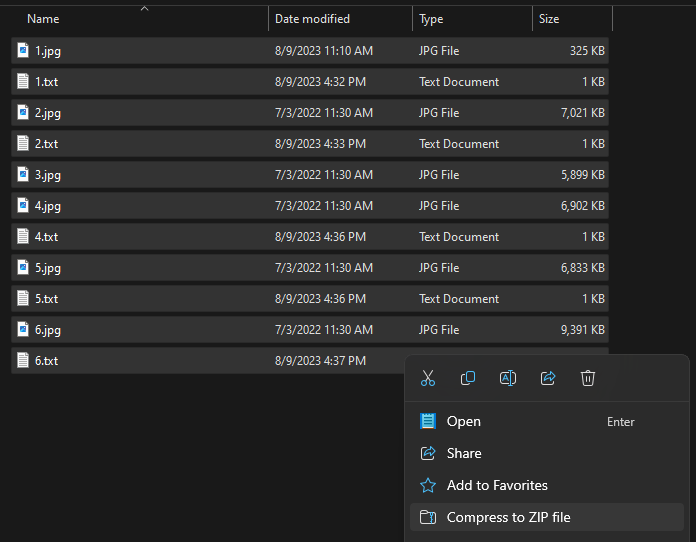
When you zip this data up, you should only select your image/caption file pairs. Do not include the parent folder when preparing the zip file.
Content Acknowledgement & Attestation
Before uploading any images to the LoRA trainer, we ask that you read and confirm an acknowledgement;
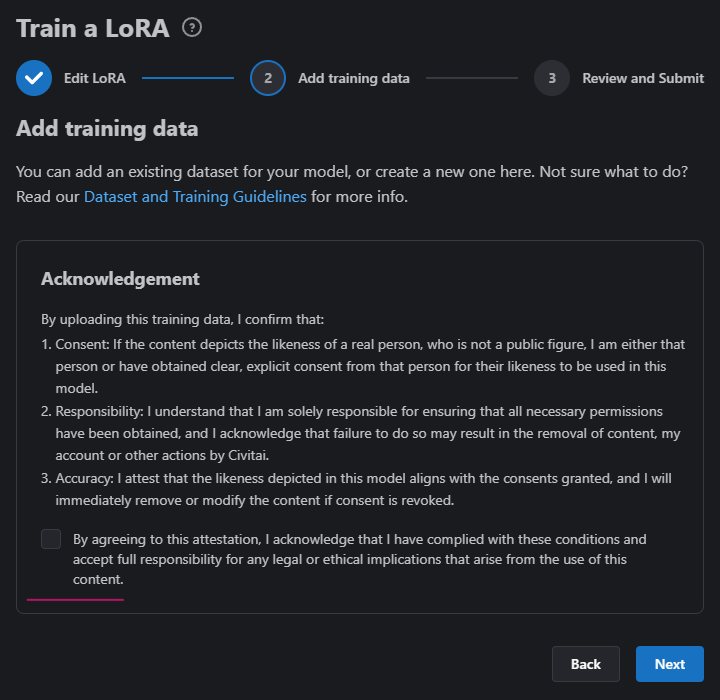
By uploading training data to Civitai, you’re confirming that if your training data set contains images of a real-world person, you either are the person depicted in the data set, or you have obtained explicit consent to use images of the person in the data set to train your LoRA.
Checking the box removes the Acknowledgement panel and allows images to be uploaded.
Accepted File Extensions
For images, we accept any of the following image file extensions: .png, .jpg, .jpeg, .webp
For caption files, we only accept .txt file extensions.
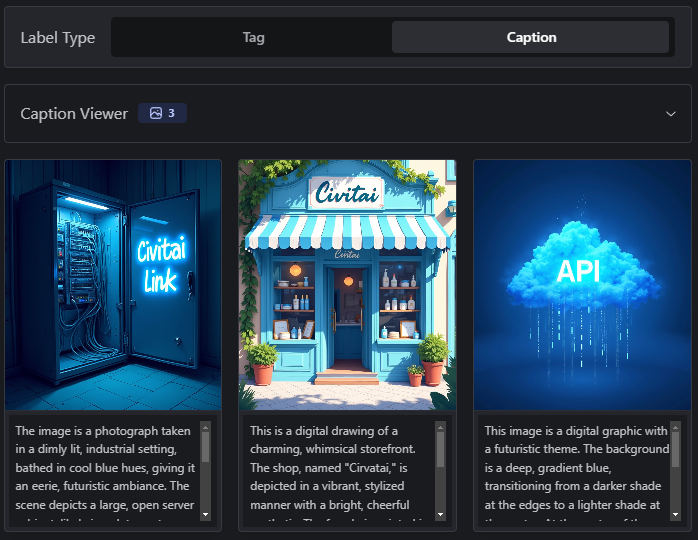
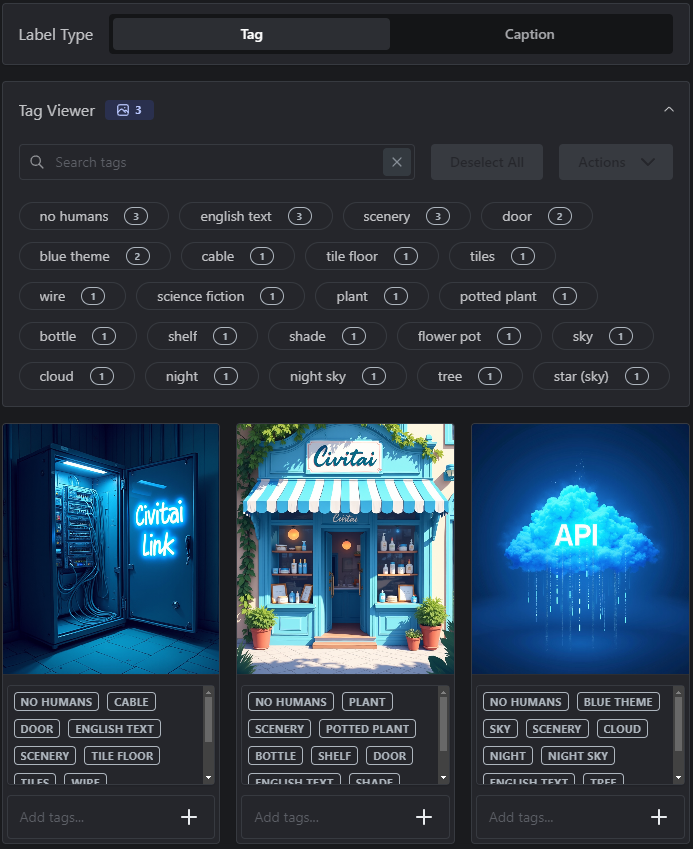
Captioning & Managing Image Captions
You’ll then have the ability to edit your captions manually, or use our Auto-Labeling/Captioning feature.
There are two types of Captioning available for LoRA training on Civitai; Tag based, and Caption based.
Captions are an important component of training a successful model. You can train models without them (see examples below); however, your model will often be more flexible and better overall when you do provide them. To train captionless, leave the boxes below each image blank.
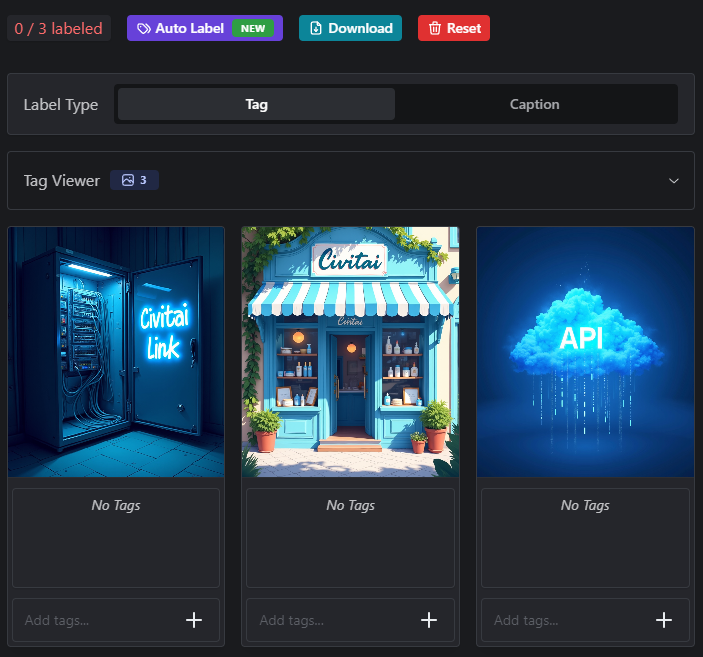
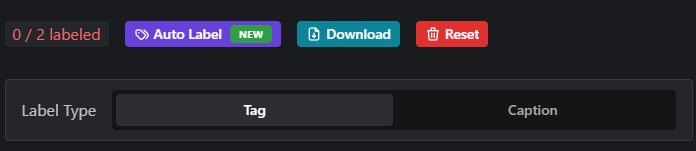
Auto Tagging, (or Auto-Captioning) is performed via the purple Auto Label button above the Training Data images. This feature can be an invaluable time-saver when you have many images and don’t want to manually enter captions for every image!
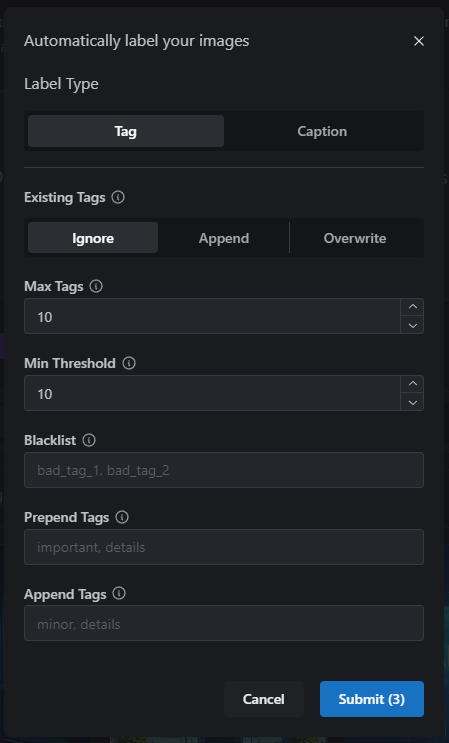
- The Tag based Label Type option uses WD Tagger 1.4 to “look” at your images, and provide short comma separated descriptions of the content. This is the preferred method for captioning SD1.5 and SDXL based LoRAs.
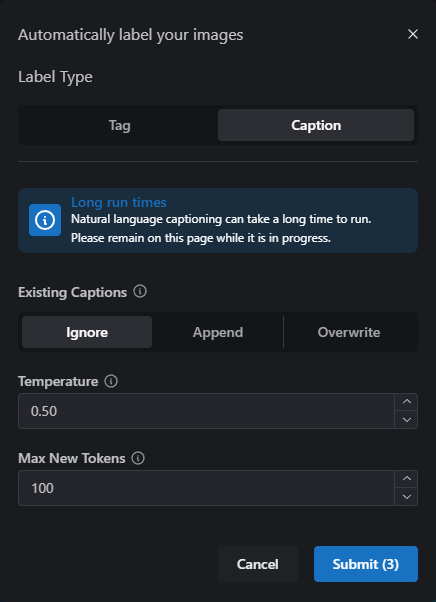
- The Caption based Label Type option uses JoyCaption to provide natural language long-form sentences describing your image content. Natural language captions are the preferred method for Flux LoRA training.
It’s also possible to use a combination of the two types.
Clicking the Auto Label button will open a window, with the following options;
- Label Type – The Type of captioning to apply – Tag based, or Natural Language captions
- Existing Tags – Defines how to handle existing captions on your images. If you have captioned some by hand, Ignore will not replace those. Append will add automated captioning to all images, adding to any existing values, and Overwrite will clear out all existing captions before running.
- Max Tags – The maximum number of comma separated words (tags) you’d like applied to each image.
- Min. Threshold – The threshold for identifying objects in your images. The default setting of 0.4 works well, but you may want to tweak this to let the Tagger have more “free will” in what it “sees” in your images.
- Blacklist – If there are words or aspects of your image you would like the tagger to ignore, across all images, you can specify them here and they won’t be added to your images.
- Prepend Tags – Manually adds tags to the beginning of each caption block, allowing you to define a trigger word across all images, for example.
- Append Tags – Manually adds tags to the end of each caption block, allowing you to add additional tags across all images.
- Temperature – Higher Temperature values encourage diverse and creative responses. Lower values produce more predictable descriptions.
- Max New Tokens – Gives guidance on how long the caption description will be.
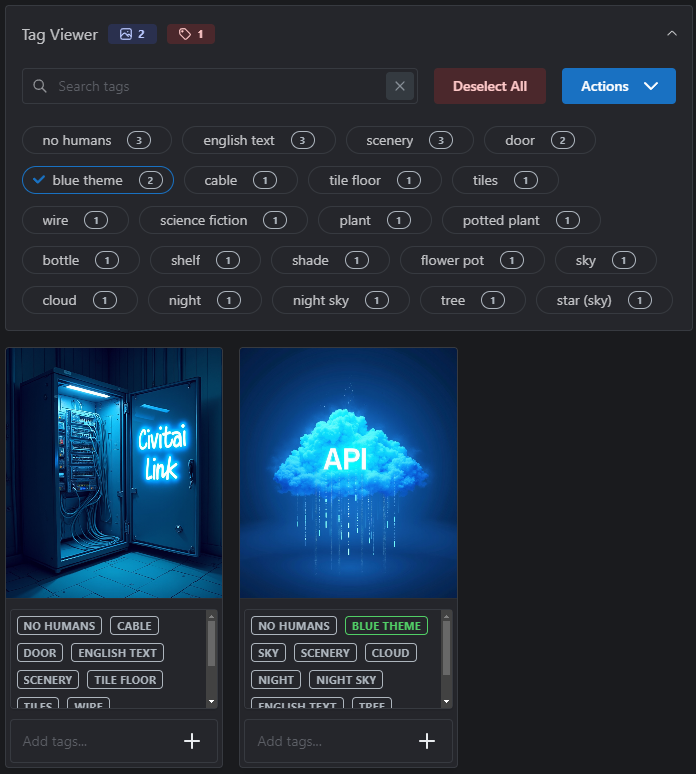
After captioning is completed (either manually or via the Auto-tagger) there are options to review the captions and make tweaks, as necessary;
Selecting a caption will show all the images to which it is applied, and also provide options for removing, or replacing the caption with a different value, via the Actions button;
Saving Captioned Data sets
Before moving on to Step 3, it’s a good idea to save your captioned images to your local computer! You can do this from the teal colored Download button, above the images;

Clicking Download will initiate a download of a .zip file containing the image files and associated .txt files containing the captions.
This zip file containing the images and captions can be uploaded again at Step 1, should you wish to train another LoRA using the same data set, without having to re-caption.
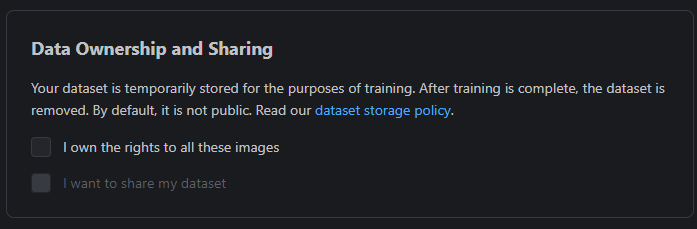
Data Ownership & Dataset Sharing
The last step on this page is to confirm that you own the rights to the uploaded images, and glance over our dataset storage policy.
Checking the box for “I want to share my dataset” will make the uploaded images available on your auto-generated Model Card, should you wish to directly publish your new LoRA to Civitai.
Click Next to continue.
Step 3 – Review settings and Submit
The final configuration step requires the selection of a Base Model. We’ve pre-set a range of base models for convenience:
| Category | Available Base Models |
|---|---|
| SD 1.5 | Standard, Anime, Semi-Realistic, Realistic |
| SDXL | Standard SDXL, Pony Diffusion V6 XL, Illustrious |
| Flux | Flux.1 Dev, Flux.2 Dev |
| Flux2 Klein | 4B Base, 9B Base |
| Other Image | Chroma 1.0 HD, Qwen-Image, ZImageTurbo, ZImageBase |
| Video | Hunyuan 720p, Wan 2.1 T2V (14B), Wan 2.1 I2V (14B, 720p), LTX2 |
Some models require the AI-Toolkit training engine (Qwen, ZImage, Flux2 Klein, LTX2), while video models use the Musubi engine. The engine is selected automatically based on your chosen base model.
There’s also an option to train against a base model of your choice! Note that this incurs and additional Buzz cost due to extra processing required for us to load that Checkpoint into a worker GPU, which ties it up for the duration of the training run.
Note that when choosing Flux Dev with Tag-style captions, you’ll receive a warning, suggesting that Flux works best with Natural Language Captions, and vice versa – SD1.5 and SDXL models will display a warning when the data set is labelled with Natural Language Captions.
This warning is purely informational and you can disregard it and proceed without making any changes to your captioning, should you wish.

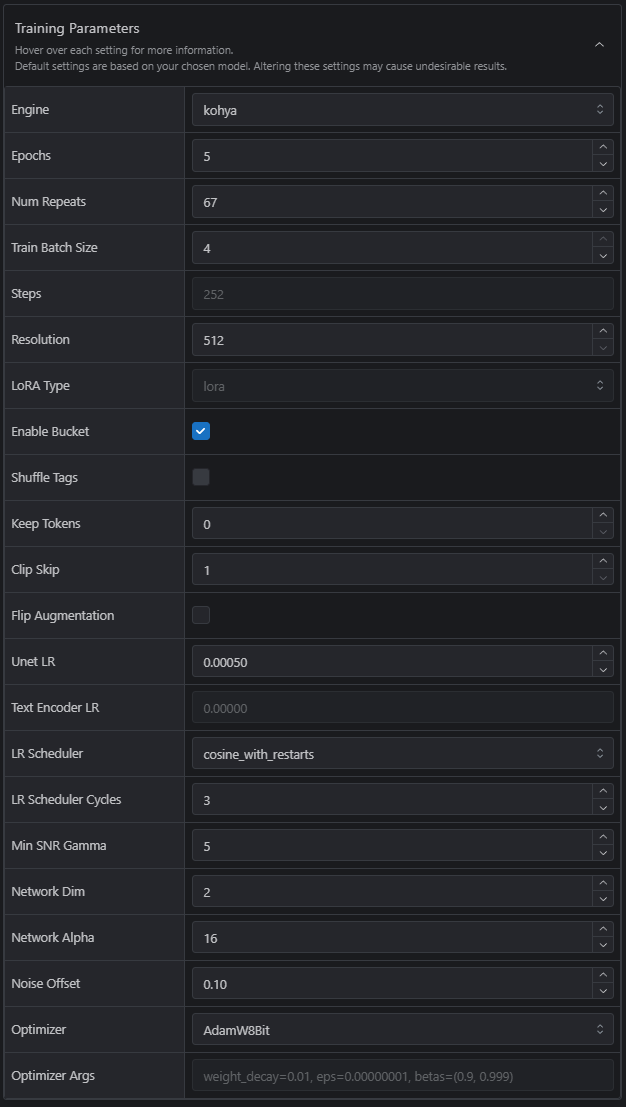
Advanced users, or anyone who loves the thrill of adventure into the unknown, can expand the Training Parameters under Advanced Settings and go wild!

We have limited some of the settings – you won’t be able to train with every single option currently available in the underlying training engines (Kohya, AI-Toolkit, or Musubi depending on your chosen base model), but we’re regularly adding in new options and values.
Rapid Flux Training
We’re offering Rapid Flux Training – LoRAs trained in under 5 minutes! To enable this, simply check the Rapid Training toggle after selecting Flux Dev as the Base model;
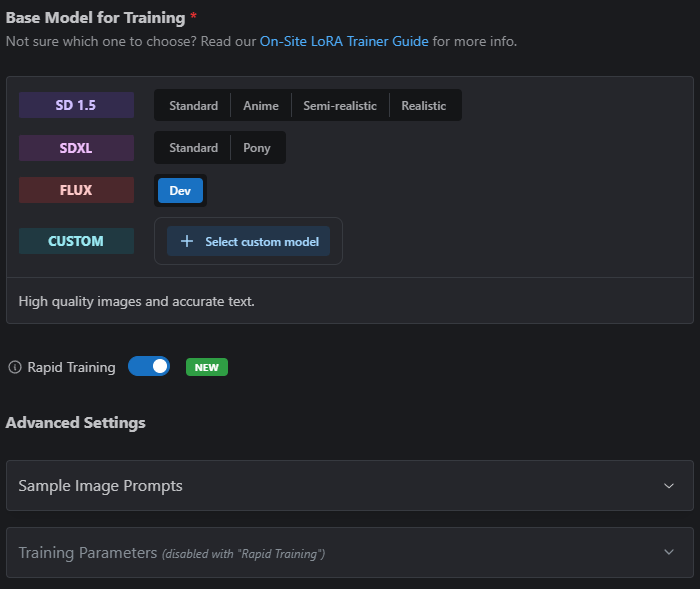
Rapid Training comes with a number of caveats! Check out our Flux Guide for the latest information!
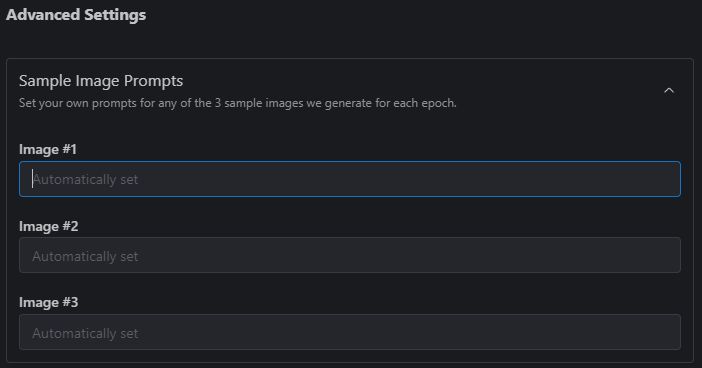
Sample Image Prompts
Under Advanced Settings there’s also an option to supply Sample Image Prompts. By default, the sample images for each Epoch are generated from the captions supplied during Step 2, but if you’d like to supply your own prompts to get a better idea of how the LoRA training is progressing, three fields are provided for custom prompts (three images per Epoch).
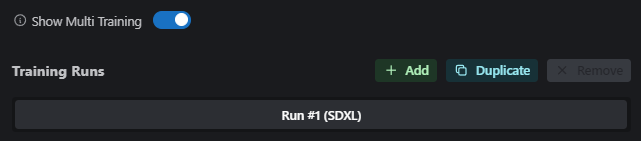
Multi-Training
There’s also an option to activate Multi-Training – a super useful feature allowing you to submit up to 5 training runs at once! Each training session will run in parallel, and will be saved as a Version in your final model output (should you wish to publish your LoRA to Civitai).
To activate Multi-Training, toggle the option at the top of the Training page;

You can then add new training runs (or duplicate the settings of the current run) using the buttons which appear;
Selecting each training run allows you to edit the base models, and advanced settings, for that particular run;

One thing to note is that each training run will show a distinct Estimated Wait Time, ETA and Buzz Cost, and the High Priority (skip the queue option) toggle – which is set on a per-run basis.
Below that, in the yellow button, you’ll see the total Buzz required for the combined training.
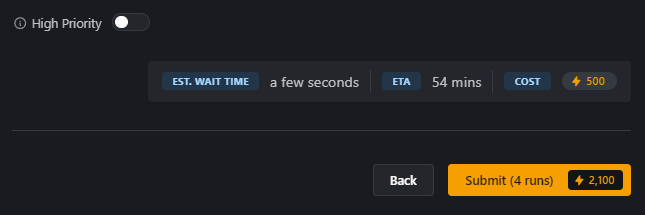
Click Submit to begin training!
Step 4 – Waiting
Now for the hard part – waiting while it bakes! After clicking Submit you’ll be taken to your Account page, to the Training tab, and a pane showing all the LoRAs you’ve trained, or are currently training, on the site. There’s a Status field, and a pretty accurate ETA.
Any issues with the uploaded training images will be highlighted under “Missing Info”.

There’s no need to sit mashing F5 until the LoRA completes – you’ll receive an email when it’s ready to test, or, if you’d like, you can monitor the status in real-time, and see the Epochs appear as they’re available – just click on the LoRA name in the training tab.
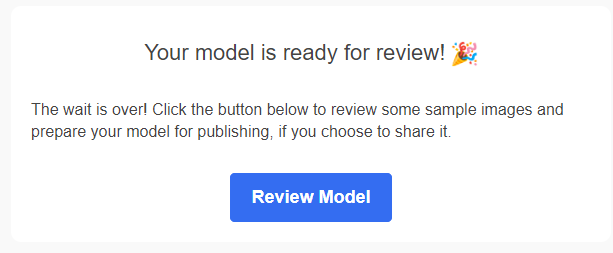
Step 5 – Testing
Clicking the link in the email, or the LoRA Name from the training tab to be taken to your results – your Epochs will be listed, with sample images generated for each based on the Sample Image Prompts you supplied during Step 3.
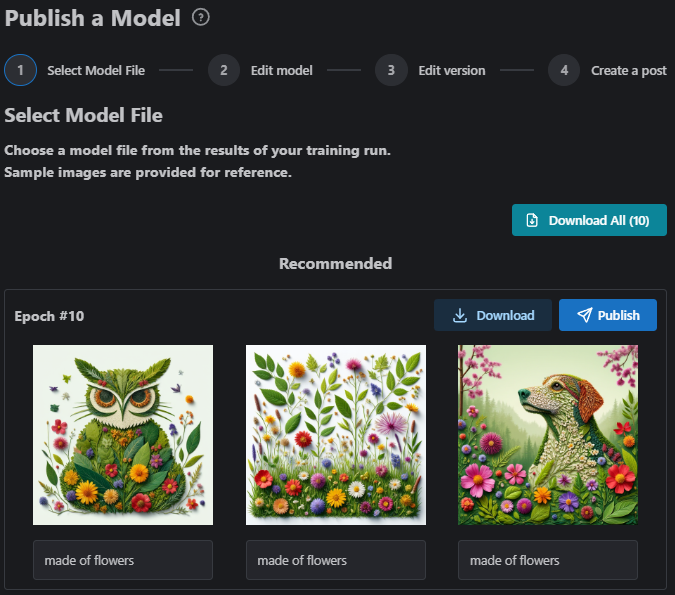
Note that you won’t receive every single Epoch requested! LoRA training uses huge volumes of storage space, and because we train hundreds of models each day, it’s just not practical for us to store them all. We will train to the Epoch specified in the Advanced Settings, but in the review screen, you’ll only be presented with a maximum of 20 Epochs to download.
You may download any of your Epochs to test at any time, but note that Epoch files from models which aren’t accepted (left in Ready status) will be deleted after 30 days.
You may also choose to Publish the best looking Epoch via the blue Publish button as a Civitai Model, to make it available for use on the on-site Image Generator!
?Beware! Once you’ve chosen to publish a specific Epoch, you won’t be able to come back to this screen – so make sure you’ve downloaded the other Epochs, should you wish, before Publishing!
And you’re done!
Training Job Data Retention
Input Files (Training Datasets) You may upload images and/or text files to be used for training your model. By default, this data will be retained for 30 days to allow for future re-use in the LoRA Trainer, unless you elect (and have the appropriate ownership rights) to share your dataset publicly. Note that any captions provided to our system will later be available as metadata on the output model file.
Output Files (Sample Images and Model Files) The images and models that result from completion of training will be retained for 30 days after the completion of the training job.
Read the full Civitai Data Storage Policy here – https://civitai.com/content/training/data-policy
Video LoRA Training
The Civitai LoRA Trainer now supports video LoRA training, allowing you to fine-tune video generation models with your own training data. Video LoRAs can be used with the corresponding video generation engines in the Civitai Video Generator.
| Video Base Model | Training Engine | Notes |
|---|---|---|
| Hunyuan 720p | Musubi | Tencent’s text-to-video model with LoRA support |
| Wan 2.1 T2V (14B) | Musubi | Alibaba’s text-to-video model |
| Wan 2.1 I2V (14B, 720p) | Musubi | Alibaba’s image-to-video model |
| LTX2 | AI-Toolkit | Lightricks’ video model, runs on Civitai hardware |
The training workflow for video LoRAs follows the same steps as image LoRA training: upload your dataset, configure captions, select your base model, and submit. The trainer will automatically use the appropriate engine (Musubi or AI-Toolkit) based on your selected video base model.
Examples
Below are some example images, trained using the on-site Trainer;
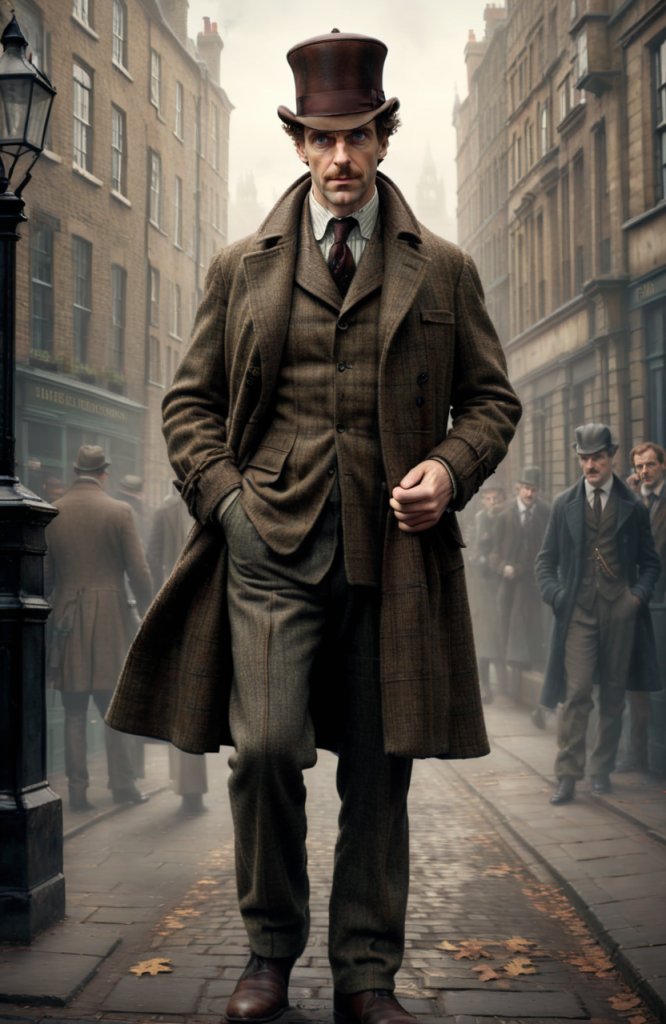
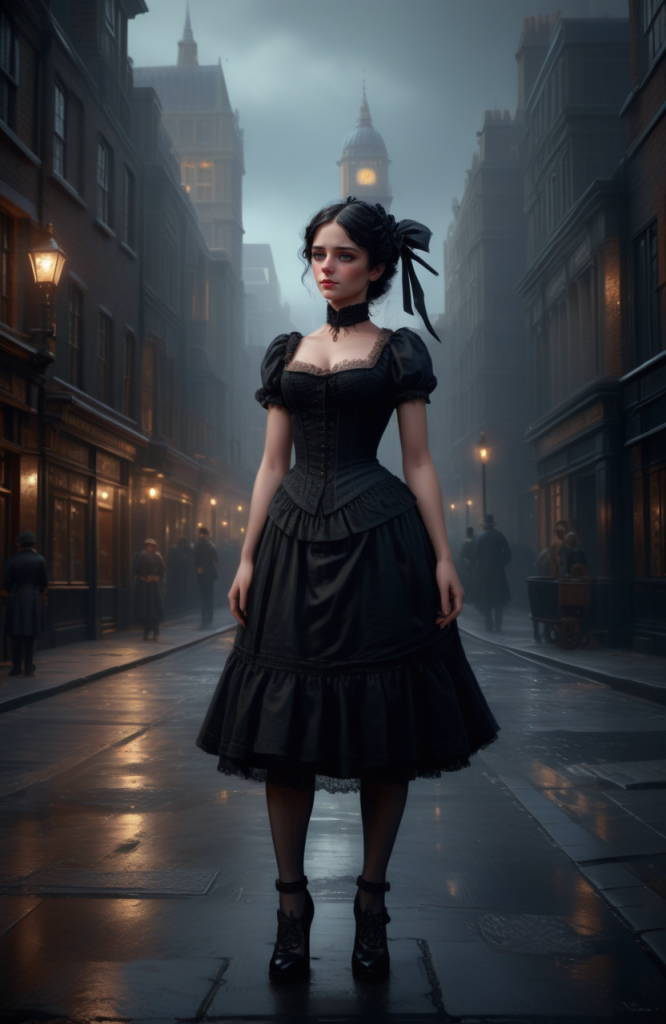
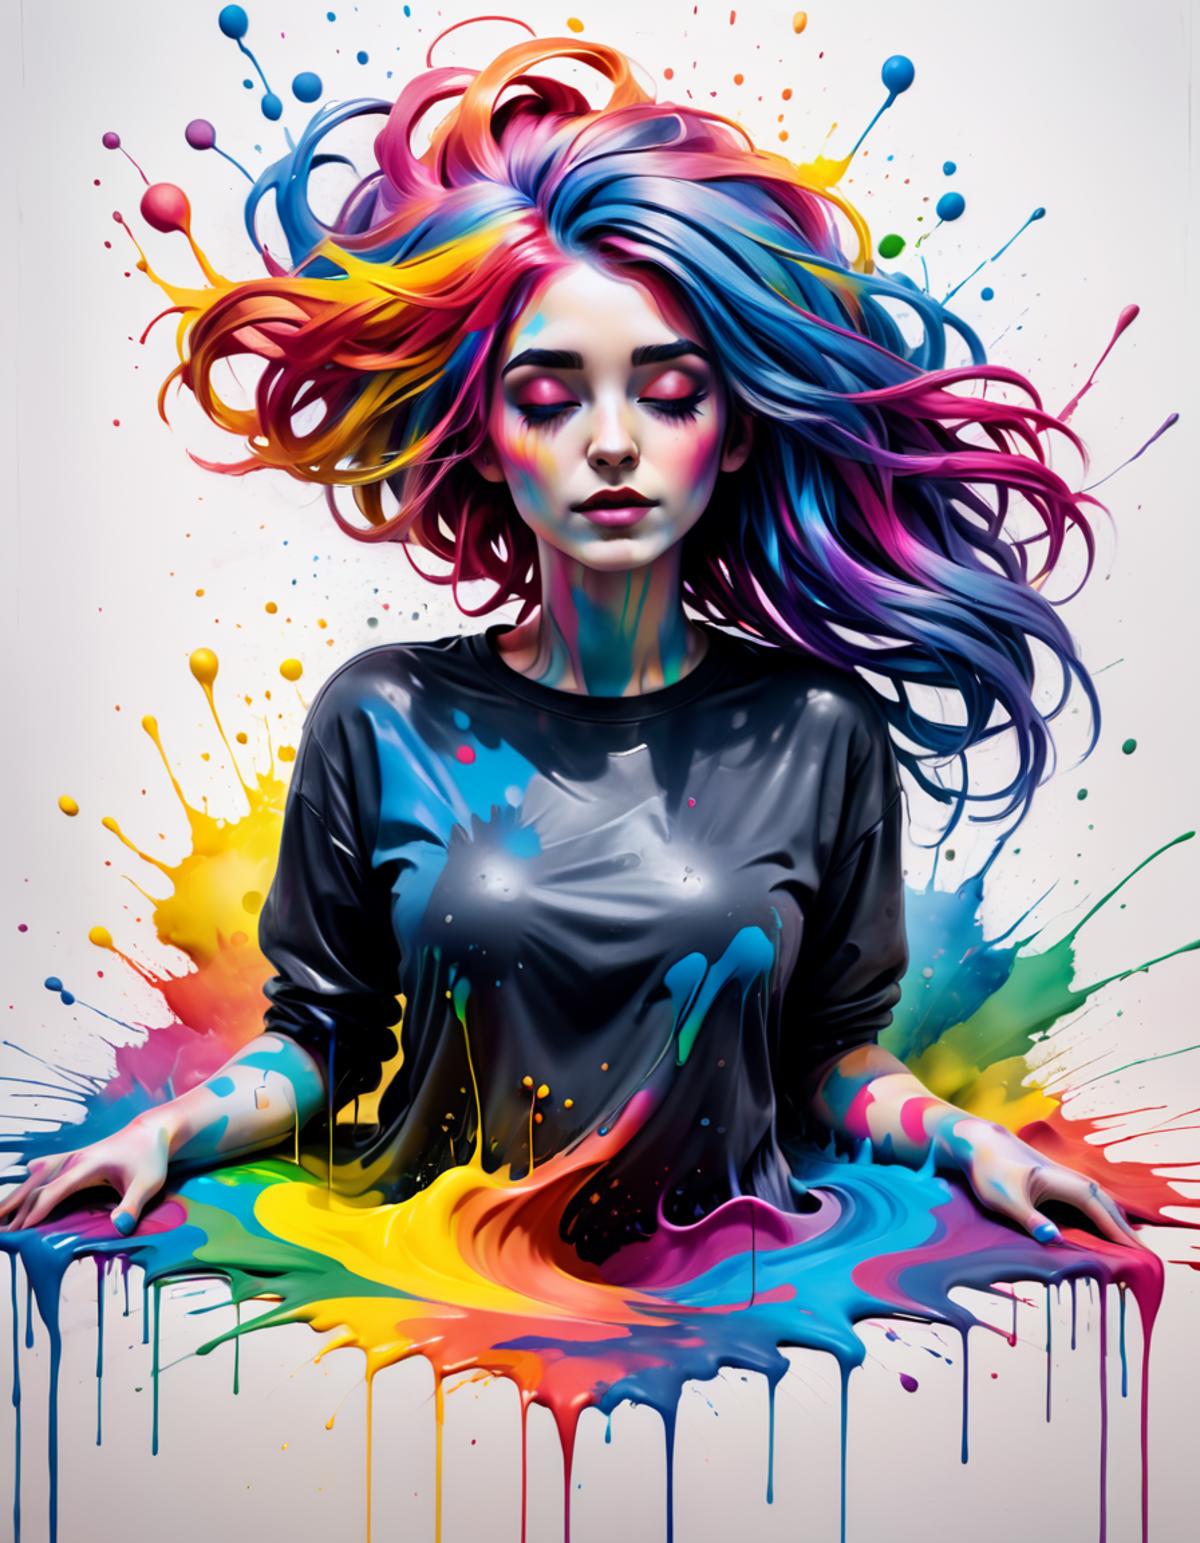
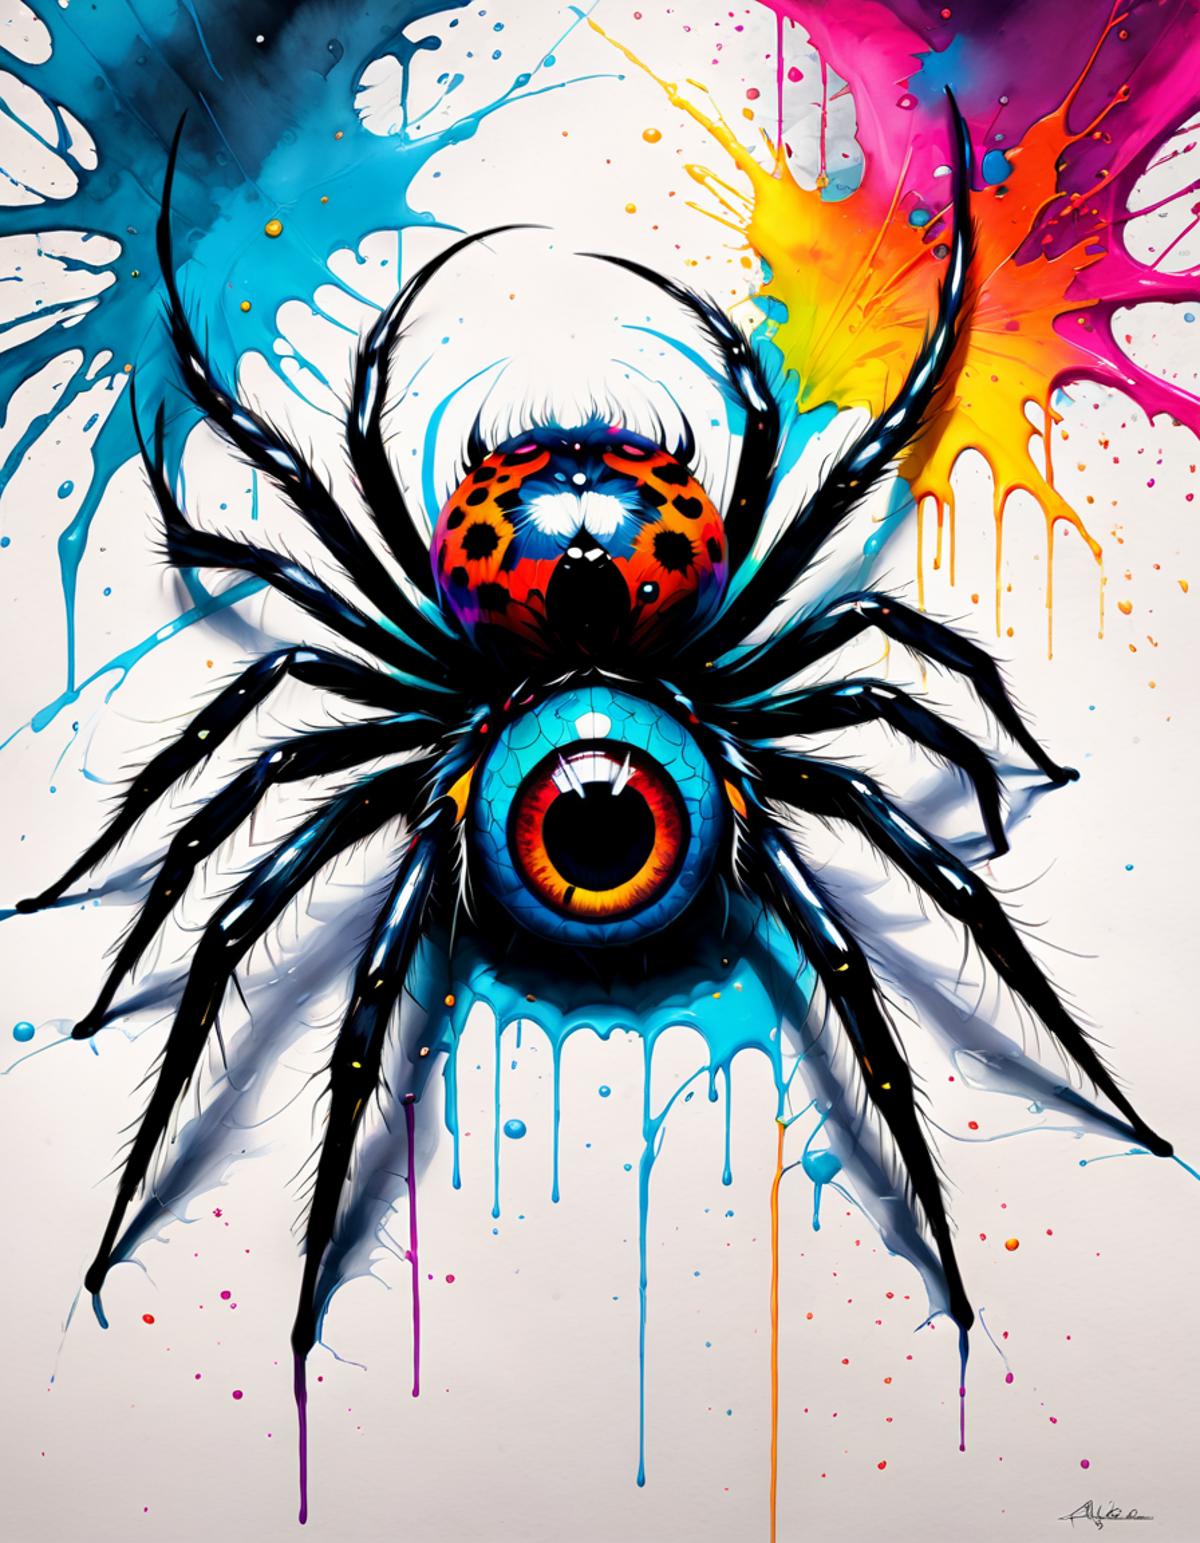
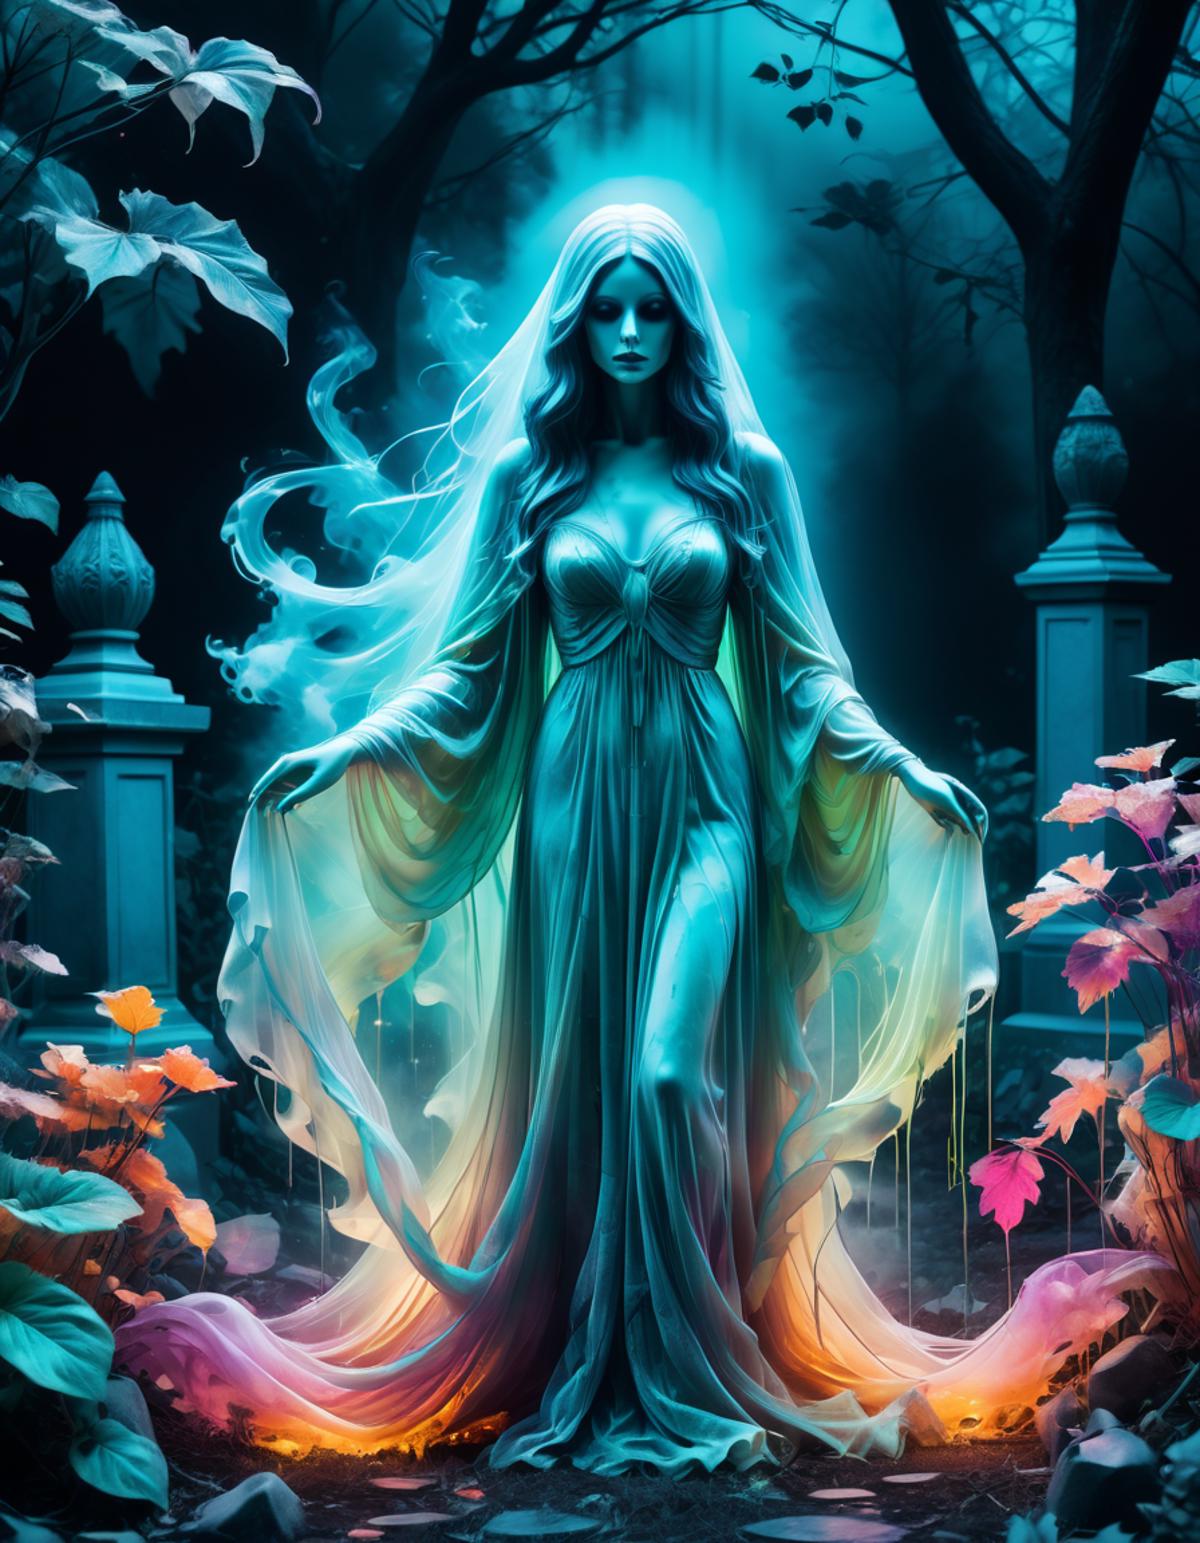
Empire Style – SDXL – Trained on 17 uncaptioned images of Victorian city streets

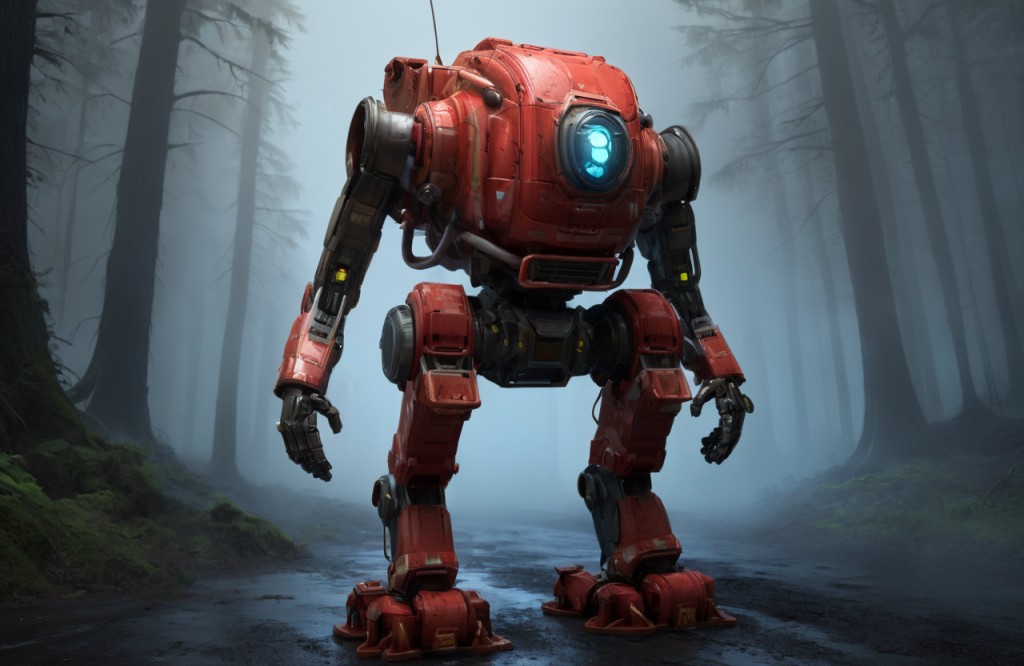
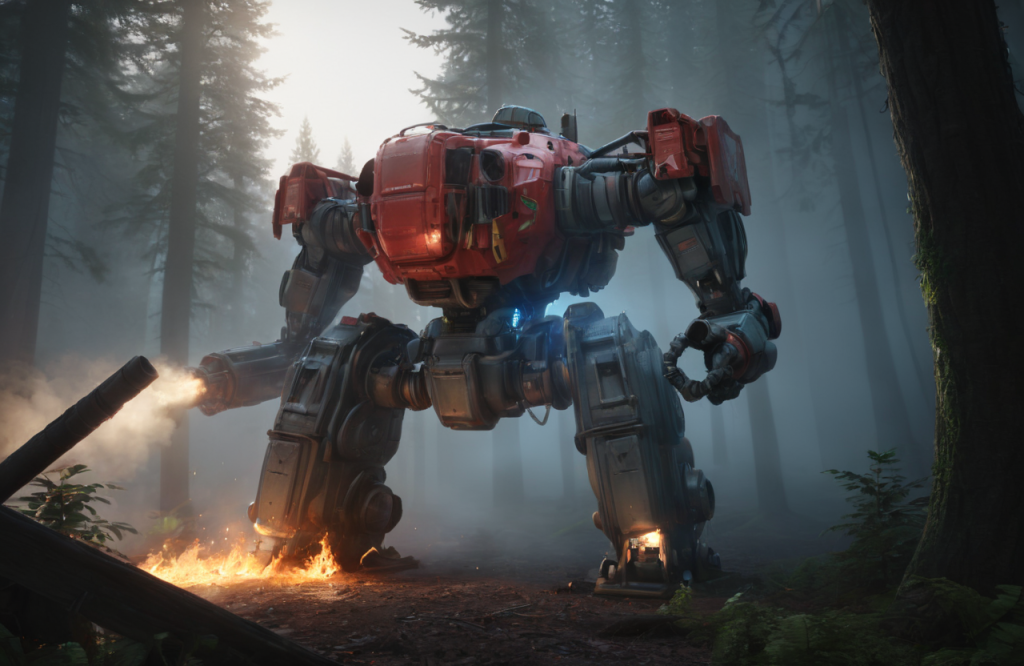
Big Stompy Robots – SDXL – 15 uncaptioned images of mecha/big robots
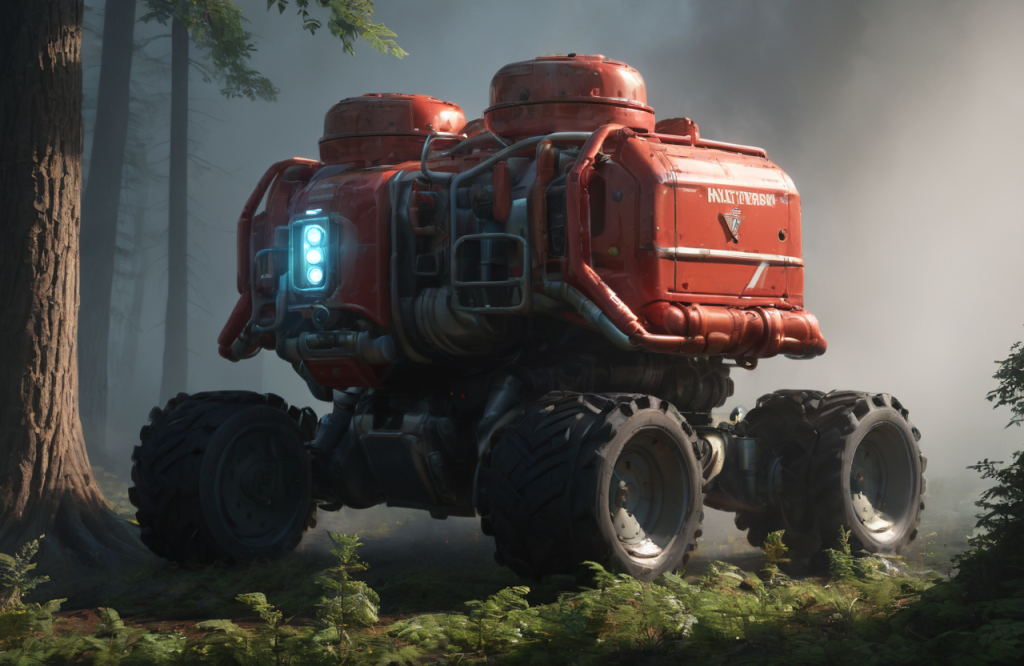
Paint Splash Style – SDXL – 30 captioned images
FAQ
- Can I stop training once it has started?
No, once you pay the Buzz fee and training begins, it can’t be stopped.
- What happens if my training fails?
We automatically retry each failed run 3 times before we mark the training session as truly “failed”. If your training fails completely, you’ll automatically be refunded the full buzz amount of the run.
- My training is stuck/failed and I didn’t receive a refund!
If your training is still processing after 48 hours it should be automatically refunded, but if you don’t receive a Buzz refund, please reach out to a Community Manager via Discord or [email protected]