
| Last Update | Version | Changes |
|---|---|---|
| 8/17/2023 | 1.0 | First version! This document will be kept up to date with SDXL 1.0 Training Developments |
?? This guide will provide;
- The basics required to get started with SDXL training
- Sample settings which produce great results
- Tips gleaned from our own training experiences
- This guide is not;
- A full, comprehensive, LoRA training tutorial
- A full Google Colab Tutorial (but we’ve covered the essentials!)
- A Kohya Trainer Tutorial (but we’ve covered the essentials!)
- Definitive settings which will always work 100% of the time – experimentation is required!
What is SDXL 1.0?
SDXL 1.0 is a groundbreaking new model from Stability AI, with a base image size of 1024×1024 – providing a huge leap in image quality/fidelity over both SD 1.5’s 512×512 and SD 2.1’s 768×768. The model also contains new Clip encoders, and a whole host of other architecture changes, which have real implications for inference (generating images) and training.
Read our SDXL Overview Guide here for more information on getting started with SDXL.
Training SDXL
Before SDXL launched, Stability AI teased us with posts detailing how easy it is to train against SDXL. There’s some truth to that – it is very forgiving, and many different settings produce extremely good results, however – the hardware requirements are higher than expected!
Local Training Requirements
Training SDXL has significantly higher hardware requirements than training SD 1.5 LoRA. The community is still working out the best settings, and it will take some time for the training applications to be optimized for SDXL, but at time of writing (8/3/2023) we can safely say that;
- At least 12 GB of VRAM is
necessaryrecommended - PyTorch 2 tends to use less VRAM than PyTorch 1
- With Gradient Checkpointing enabled, VRAM usage peaks at 13 – 14.8 GB
- Some users have successfully trained with 8GB VRAM (see settings below), but it can be extremely slow (60+ hours for 2000 steps was reported!)
- Fine-tuning can be accomplished with 24GB VRAM with the batch size of 1.
Trying to train with 8GB-10GB of VRAM? Try these settings! Success isn’t guaranteed though!
- Enable Gradient Checkpointing
- Enable Memory efficient attention
- Set LR Scheduler to Constant
- Use Optimizer AdamW8bit
- Set the Network Rank (Dimension) LOW – higher than 24 may not be possible
- Reduce the input image size! 768×768 images, or even 512×512 significantly reduce the VRAM requirements, with a quality trade-off.
Colab Training Requirements
Google Colab is a free*, cloud-based platform for data analysis and machine learning. It allows users to write and execute Python (and other) code in a virtual Jupyter Notebook environment. In terms of AI and Stable Diffusion specifically, it allows us to run applications which we don’t have the hardware (graphics card, memory, etc.) to run locally.
To get started with Google Colab, simply navigate to colab.research.google.com and sign in with your Google account. Once you’re signed in, you can create a new notebook by clicking on the “New Notebook” button, however – many pre-built notebooks exist for specific purposes – this is where Colab shines.
?? However, it appears that SDXL training cannot be accomplished on the free Colab tier, and does require a paid Colab Pro account, due to the high RAM and VRAM requirements for training.
8/17 – I’m reading that free-tier training is now possible! Update soon!
There are a few good options for Colab training workbooks;
- Camenduru’s Kohya_ss Colab
- Johnson’s Fork Koyha XL LoRA Trainer (Very good LoRA training Colab – used below!)
- Linaqruf’s Native Training (Requires A100 GPU)
- Linaqruf’s SDXL LoRA Training (Fine-tuning Method)
How to use a Colab Workbook (Basics)
Think of a Colab Notebook as a workflow – we start at the top of the page and perform tasks as we descend. We might not perform all of the tasks – some might not be necessary for our needs, but generally by the time we reach the last step, our Colab environment will be prepared and ready to perform whatever purpose the Notebook was created for.
There are a number of general concepts which we should understand when looking at a Colab notebook, because they can look fearsomely complicated;
Steps (cells)
Each “step” is officially called a “cell”. A notebook is a list of cells. Cells contain either text, or executable code.
an example of a cell;

To execute code in a cell, mouse over the [ ] to the left of the cell and click the circular arrow “run” button.
The code in the cell will execute, and in this case, will print out the result in the page.
After execution, you’ll see a green checkmark to show the code within that particular cell has finished running successfully;
Some cells will perform multiple tasks, including downloading additional files, or installing dependencies. Note that these downloads and installs are not affecting your local PC – they’re running “inside” the virtual notebook to which you’re connected, via Colab.
Sometimes cells are editable, and require inputs – usually file paths (see Google Drive Integration, below). To edit a cell you can double-click to enable a cursor.
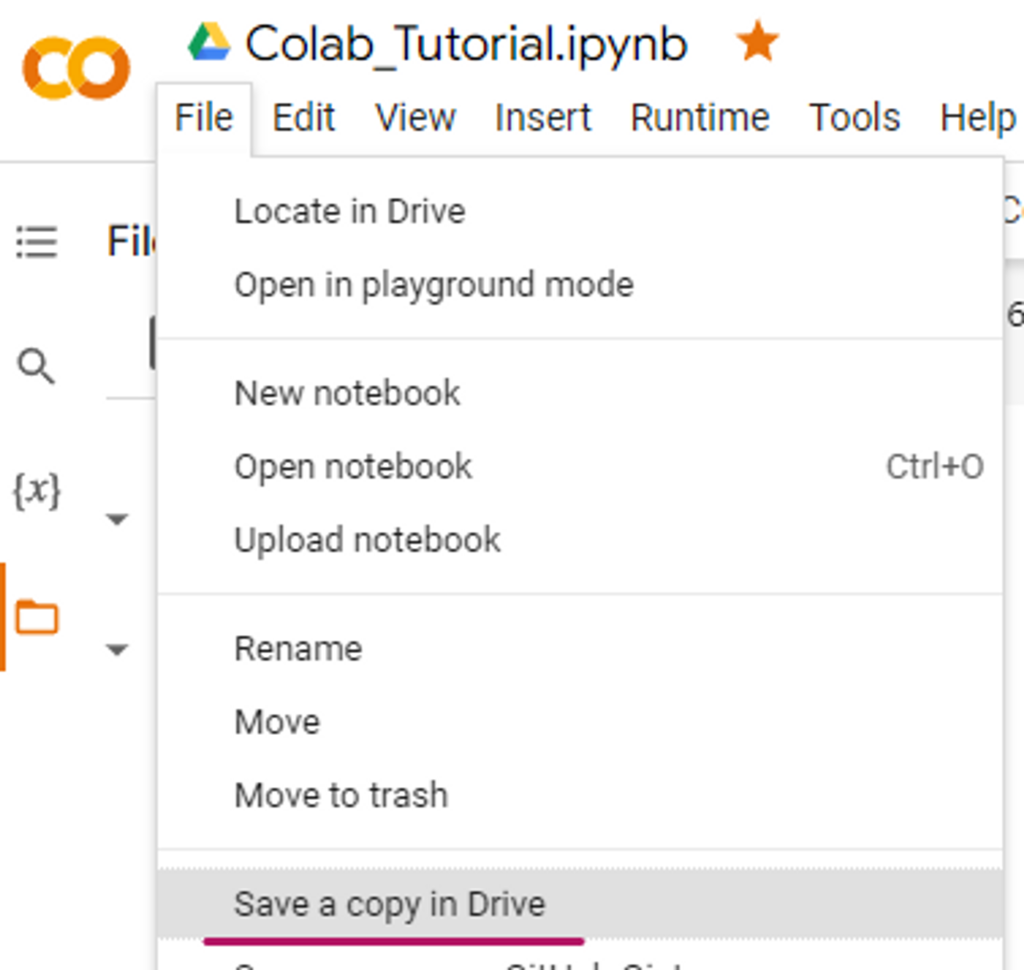
Copying Colab Notebooks
Since Colab Notebooks are just lists of Python instructions, we can copy them to our own Google Drive. This is useful if you’d like to edit someone else’s Colab, or it’s one you frequently use and don’t want the original author to change (break) it.
If you save a local copy in Google Drive to make changes, you can also view the Revision history by going to File > Revision History
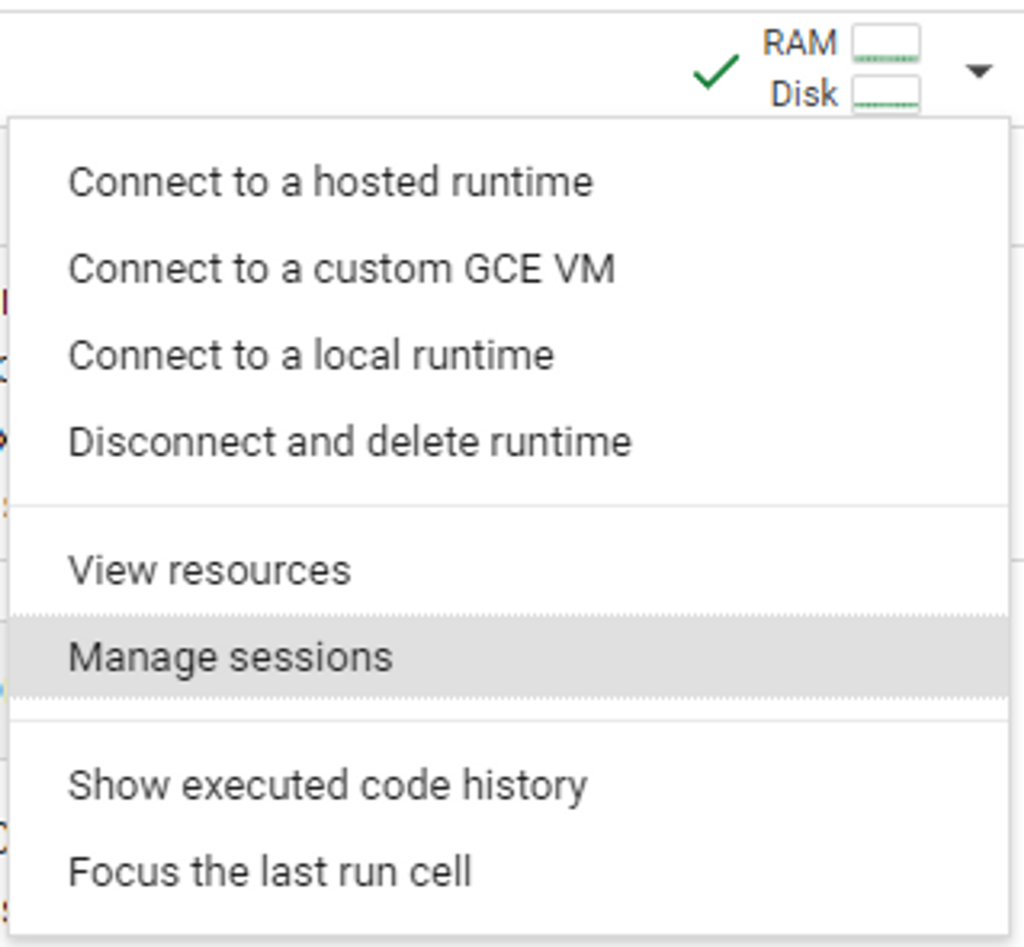
Sessions
Whether you’re running with a free or paid Colab account, you can view system usage and active Colab sessions. This is most important when you’re using paid Compute Units, as you should always disconnect from your active session once you’ve finished processing to avoid inadvertently using your precious Compute Units.
When you first open a Colab you’ll need to connect it up to Google’s resources. You can do so just by running the first code cell, or by connecting manually;
Once connected, you can view (and control) your active sessions from the “Manage Sessions” menu.
When you’re finished using the notebook, it’s best to either select “Disconnect and delete runtime”, or click the trashcan icon from the Active Sessions display.

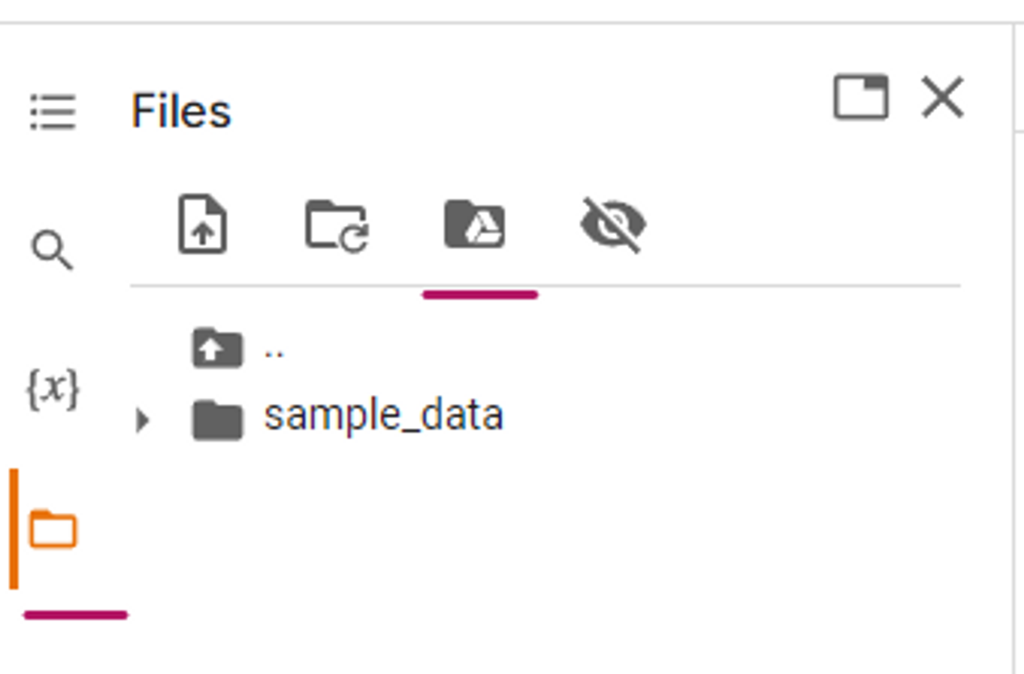
Google Drive Integration
Sometimes Colab notebooks require us to upload files from our local PCs, or download output files generated on the virtual notebook. Colab notebooks are integrated with Google Drive.
Depending on the notebook you’re using, the creator might have implemented code to connect to your Google Drive as part of the Colab workflow;
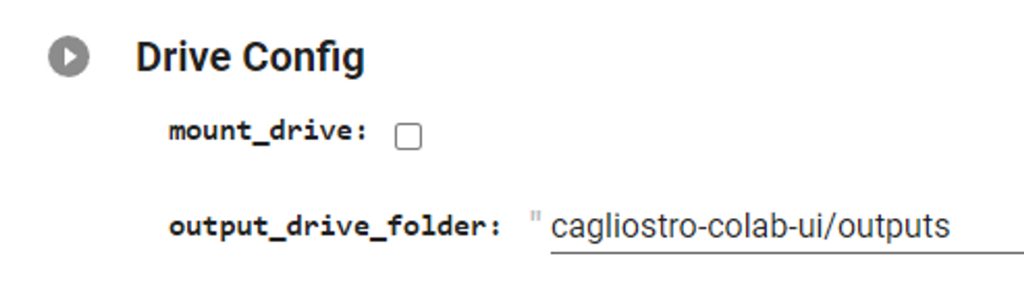
Or you might have to connect manually using the Folder icon on the left of the Colab page, and the Mount Drive icon. This will open a dialogue asking for confirmation to allow the connection between Colab and Google Drive.
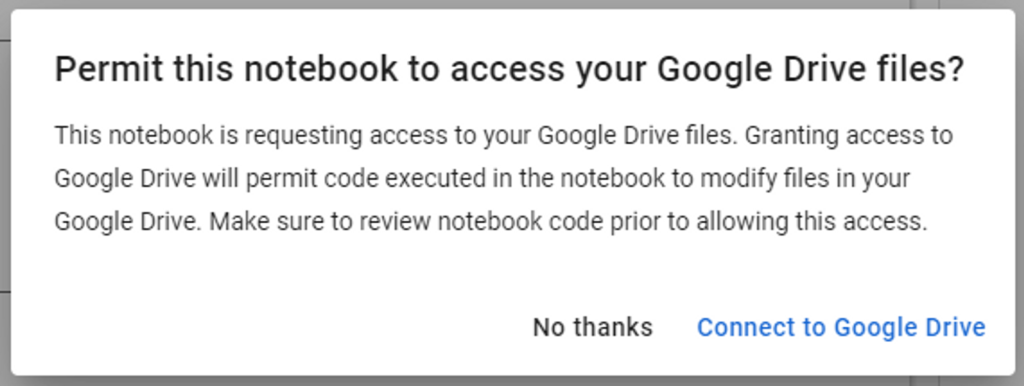
Please be aware that connecting your Google Drive to a Colab without fully understanding what it does is a risky business! Please be careful of what the Colab is doing before agreeing to connect, as once connected the Colab has full control over all your files!
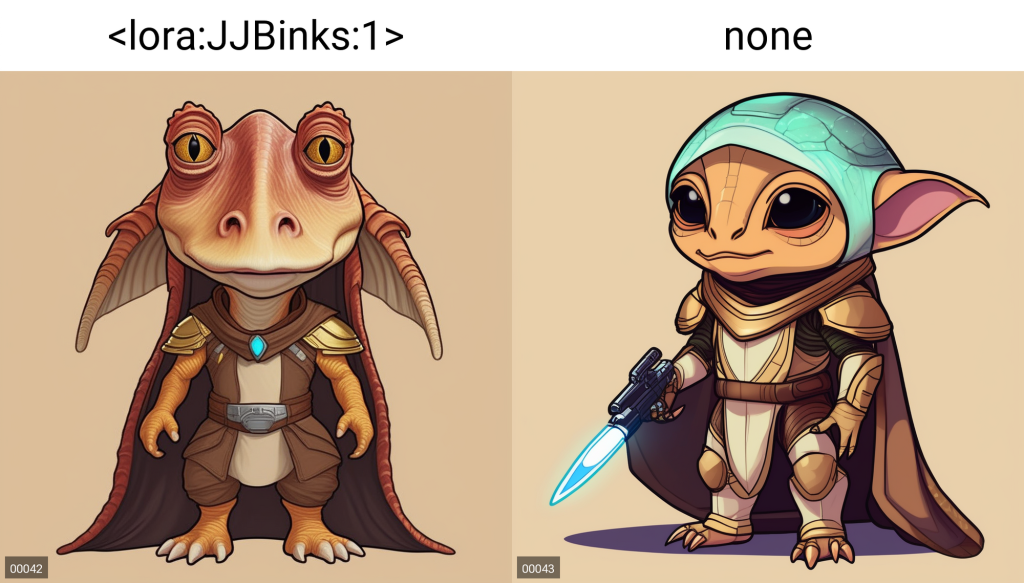
Our Test Data Set
For this guide we’ve put together and captioned 15 images of everyone’s favorite Star Trek character, Jar Jar Binks. We have not cropped the images – they’re various dimensions.
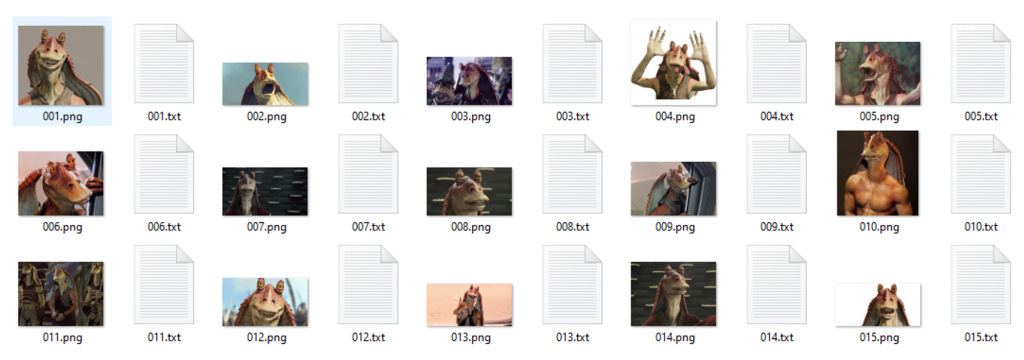
The captioning is basic;
JJBinks, Jar Jar Binks alien Gungan species, smilingJJBinks, Jar Jar Binks alien Gungan species, playfulJJBinks, Jar Jar Binks alien Gungan species, scared
Training images and captions can be downloaded here;
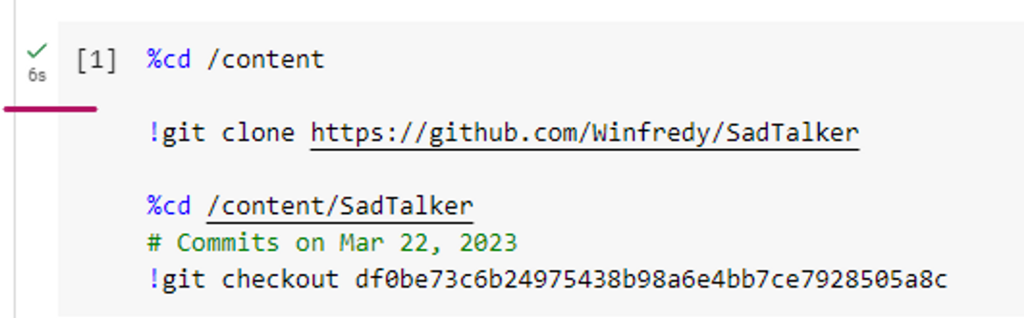
Training with Colab
Training on Colab is a little different than training locally. Many Colab workbooks have default settings set by the creators, including the one we’re using in this training example – Johnson’s Fork of the Kohya SDXL training Colab. We can absolutely go through each workbook section and modify the settings to our desired settings, but in this case we’re going with Johnson’s defaults, which produce excellent outputs (See Results).
Johnson’s Colab is extremely straightforward – work your way down from the top, reviewing the settings at each section.
Note that you WILL need a Colab Pro account ($10 USD per month subscription) to run this workbook – it WILL NOT work with pay-as-you-go credits, due to the high RAM requirements.
One section we need to customize is the Number of Repeats, Epochs, and Batch size, calculated for our number of images (15), aiming to hit 2000 steps.
Remember!
Number of Images * Number of Repeats * Number of Epochs = Total Number of Steps
Total Number of Steps is divided by Train Batch Size!
If you have a batch of 2, it will train two steps (images) at once! If you have 2000 steps, and a batch of 4, it will show as 500 total steps!
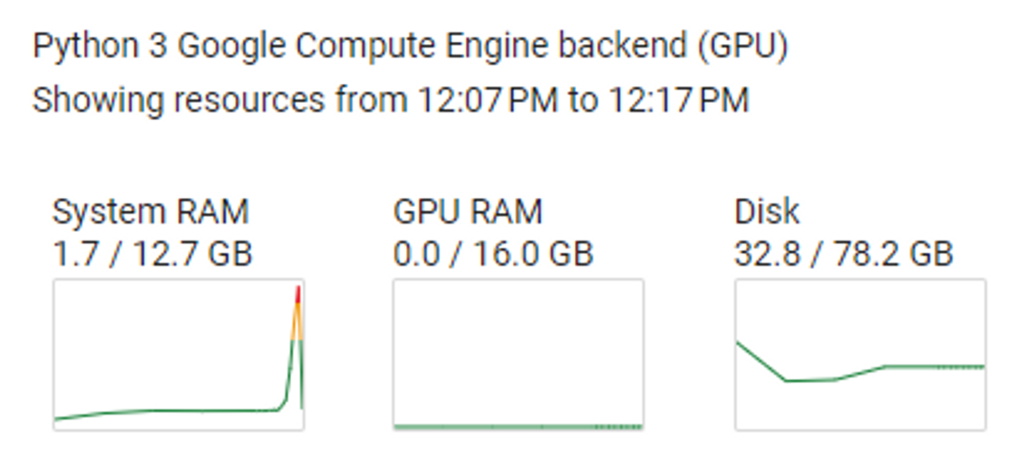
Connected to a Tesla V100 Colab Pro Runtime, with Johnson’s default LoRA settings, our 2000 step LoRA took ~1 hour.

Local Training with Kohya Trainer
We’re using the popular kohya_ss GUI (release v21.8.5), (Windows installation instructions). If you’ve used an older version of Kohya Trainer in the past, you’ll have to update, as there are SDXL Model specific settings which we need to be able to train against SDXL. Remember to set your SDXL Model path and check the SDXL Model box!
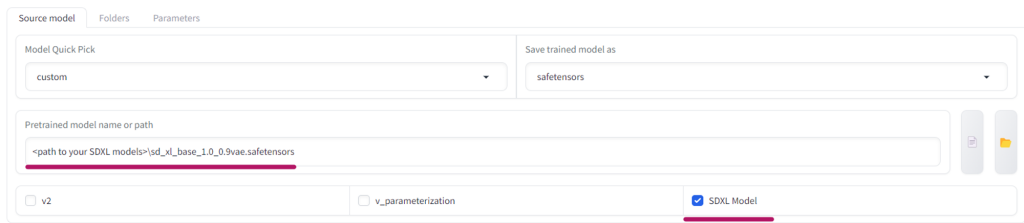
We’ve listed our recommended settings below which you can manually transpose into the Kohya settings page, or you can pre-populate Kohya with our settings by loading the .json (below) into the Configuration file section at the top of the Trainer interface;

Note that after loading our .json settings you will need to go back to set your folder paths, and SDXL model source directory to your own local paths.
Recommended Local Training Settings
We’ve used the following settings to train ~15 SDXL LoRA now, including Dragon Style and SDXL Food Icon and find them to produce quick, flexible, results, with moderate VRAM usage (13-14 GB).
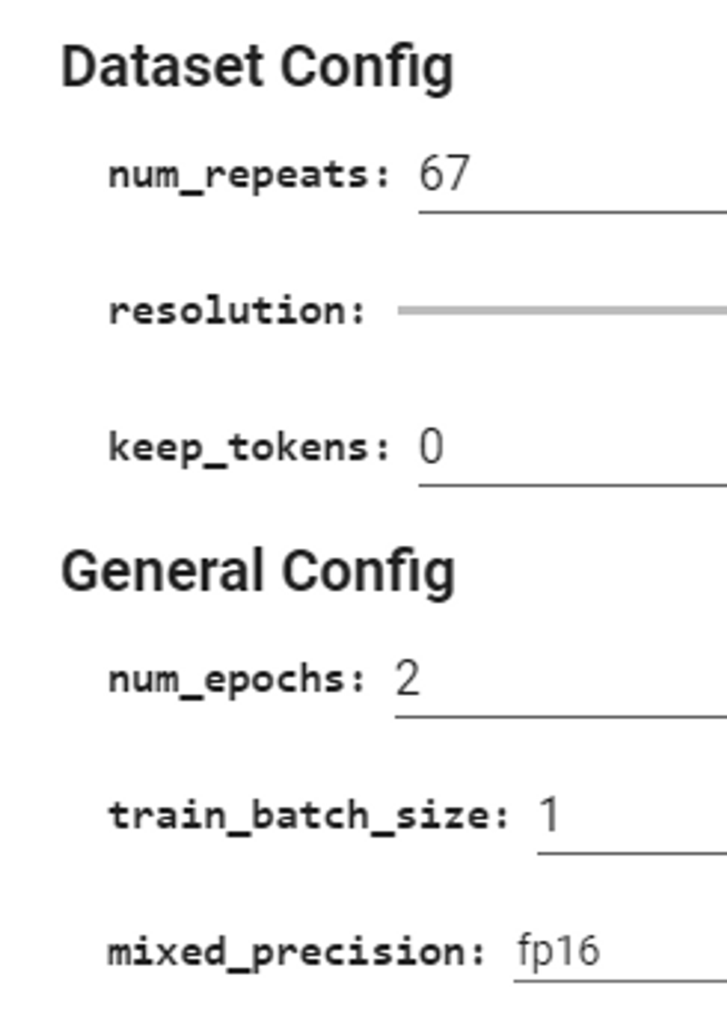
Settings used in Jar Jar Binks LoRA training. If not mentioned, settings was left default, or requires configuration based on your own hardware;
Training against SDXL 1.0 Base with VAE Fix (0.9 VAE)
15 images x 67 repeats @ 1 batch = 1005 steps x 2 Epochs = 2,010 total steps.
LoRA Type: Standard
Mixed Precision: bf16
Save Precision: bf16
Cache Latents: True
Cache Latents to Disk: True
Learning Rate: 1
LR Scheduler: cosine
LR Warmup (% of Steps): 0
Optimizer: Prodigy
Optimizer extra arguments: decouple=True weight_decay=0.5 betas=0.9,0.99 use_bias_correction=False
Max resolution: 1024,1024
Text Encoder learning rate: 1
Unet learning rate: 1
No half VAE: True
Network Rank (Dimension): 32
Network Alpha: 32
Scale weight norms: 1
Additional parameters: –max_grad_norm=0
Gradient checkpointing: True
Use xformers: True Noise offset: 0.0357
The Kohya GUI Guides page gives us an example Adafactor optimizer configuration;
optimizer_type = "adafactor"
optimizer_args = [ "scale_parameter=False", "relative_step=False", "warmup_init=False" ]
lr_scheduler = "constant_with_warmup"
lr_warmup_steps = 100
learning_rate = 4e-7 # This is the standard learning rate for SDXL
In testing, we’ve found these, and similar settings, result in extremely high VRAM usage. More investigation is required!
Misc. No-Context Tips!
“Get your batch size as large as you can with OOMing” (out-of-memory-ing)
Stability AI’s Joe Penna
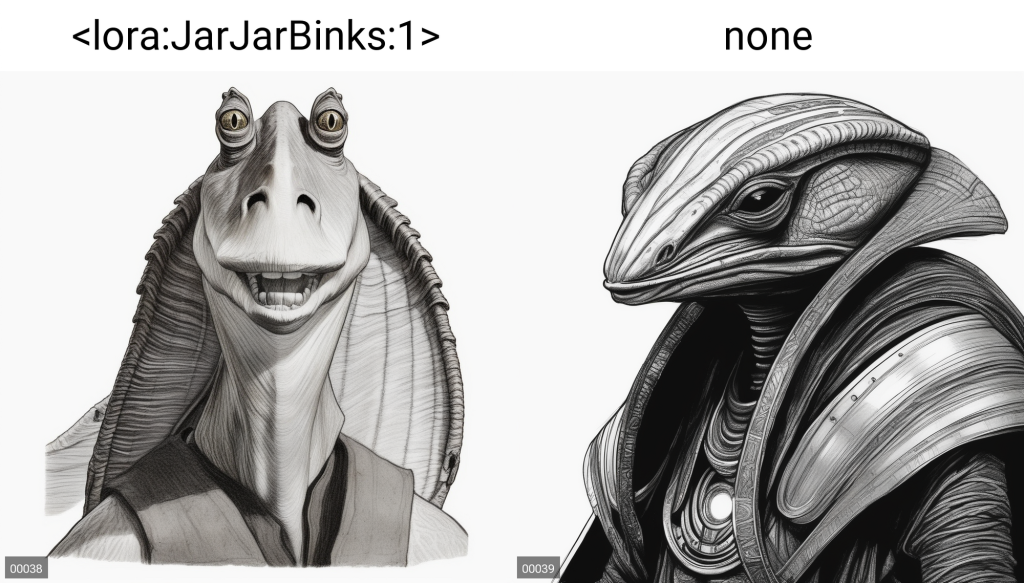
LoRA Result (Local Kohya)


LoRA Result (Johnson’s Fork Colab)