
| Last Updated | Changes |
| 9/13/2023 | First version published |
What is ControlNet?
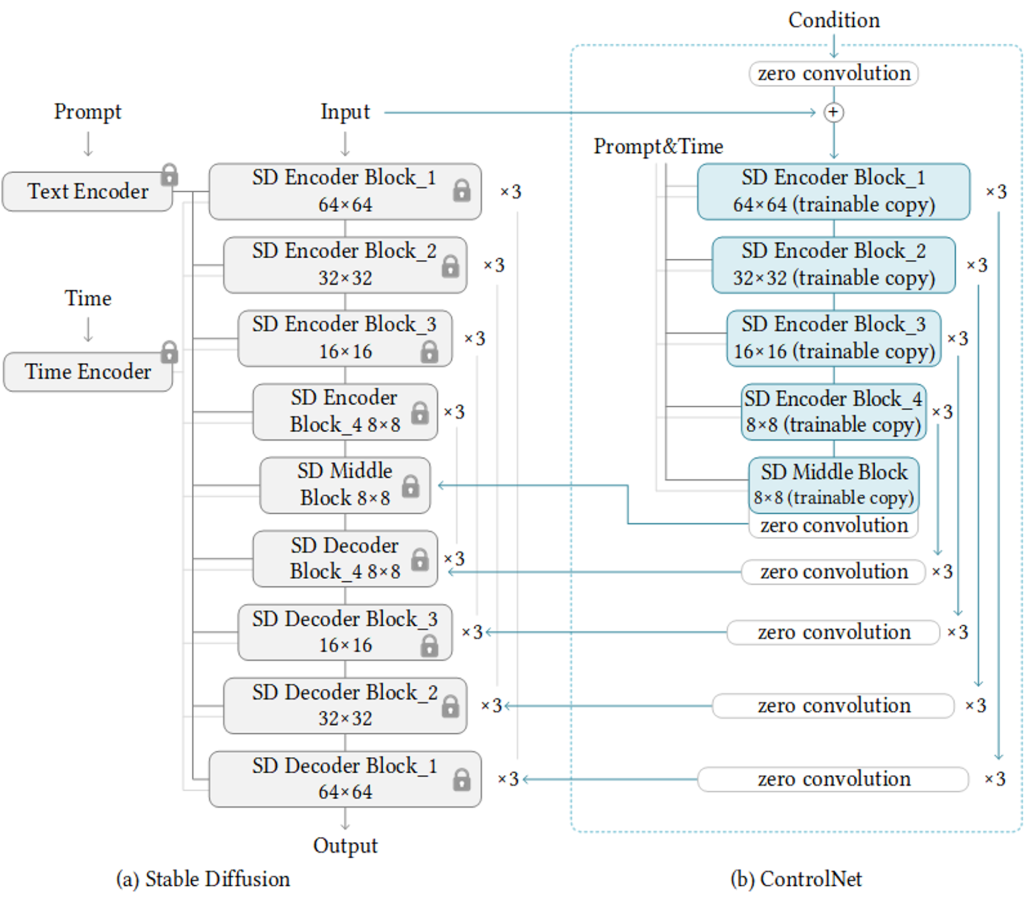
ControlNet is an implementation of the research Adding Conditional Control to Text-to-Image Diffusion Models.
It’s a neural network which exerts control over Stable Diffusion (SD) image generation in the following way;
But what does it mean for us, as users? ControlNet is a collection of models which do a bunch of things, most notably subject pose replication, style and color transfer, and depth-map image manipulation. They’re tools allowing us to transfer one aspect of an image to another.
There’s a standalone Github repository for ControlNet, maintained by user Illyasviel, and an Extension for popular SD interface Automatic1111, maintained by user Mikubill.
Show me examples!
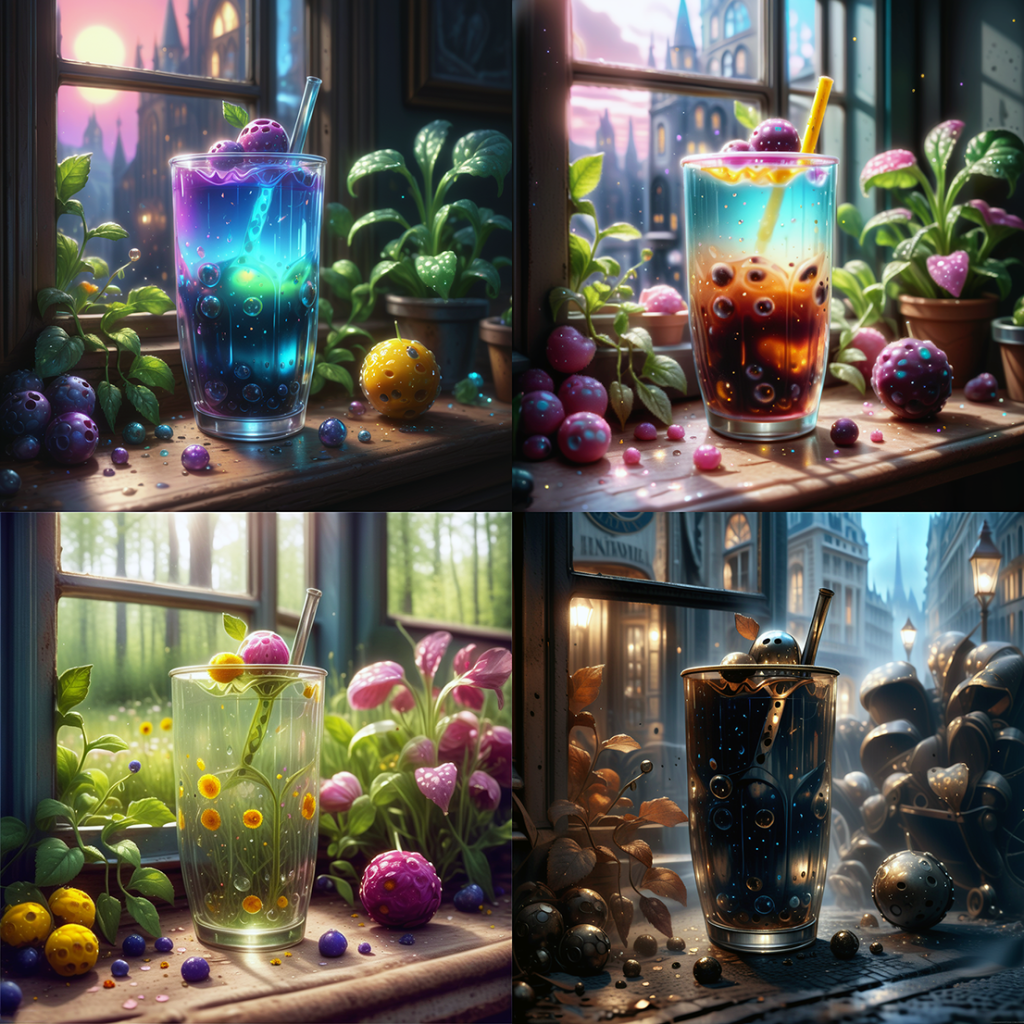
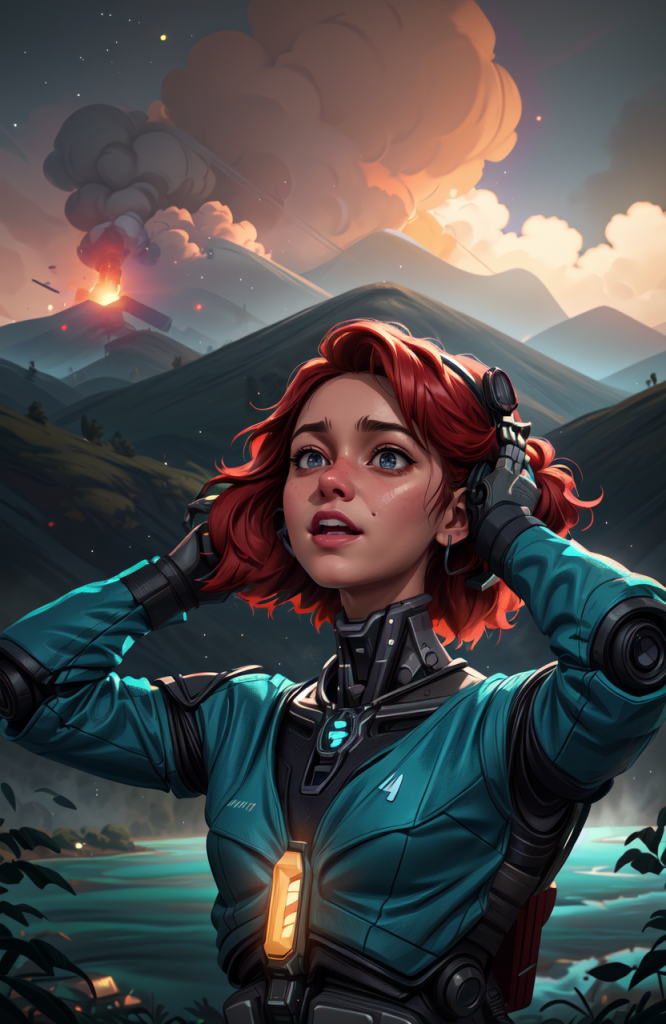
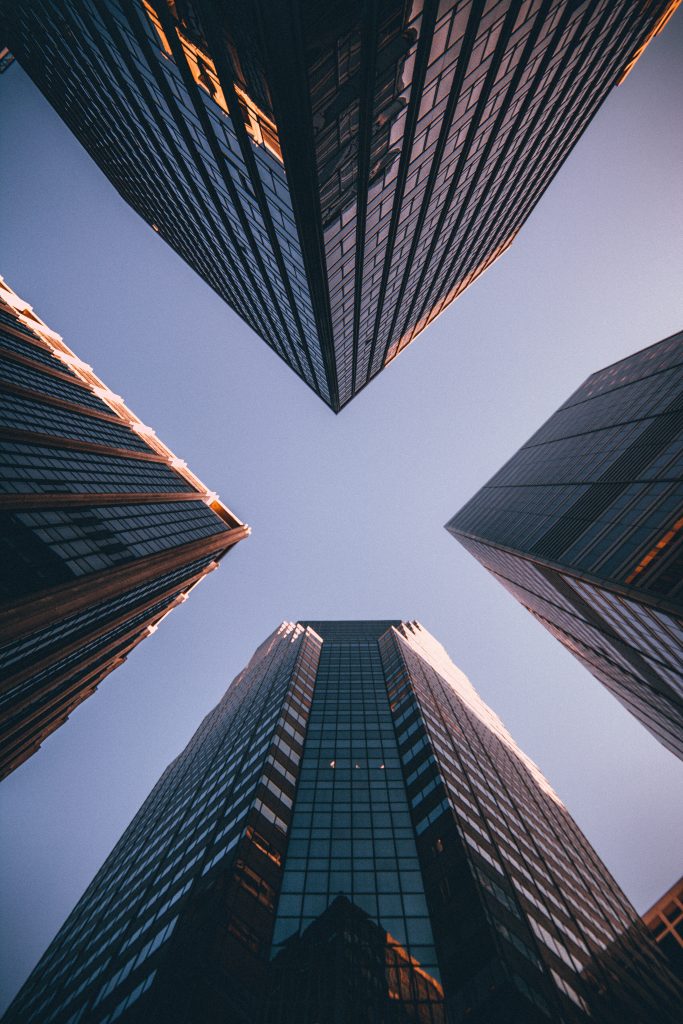
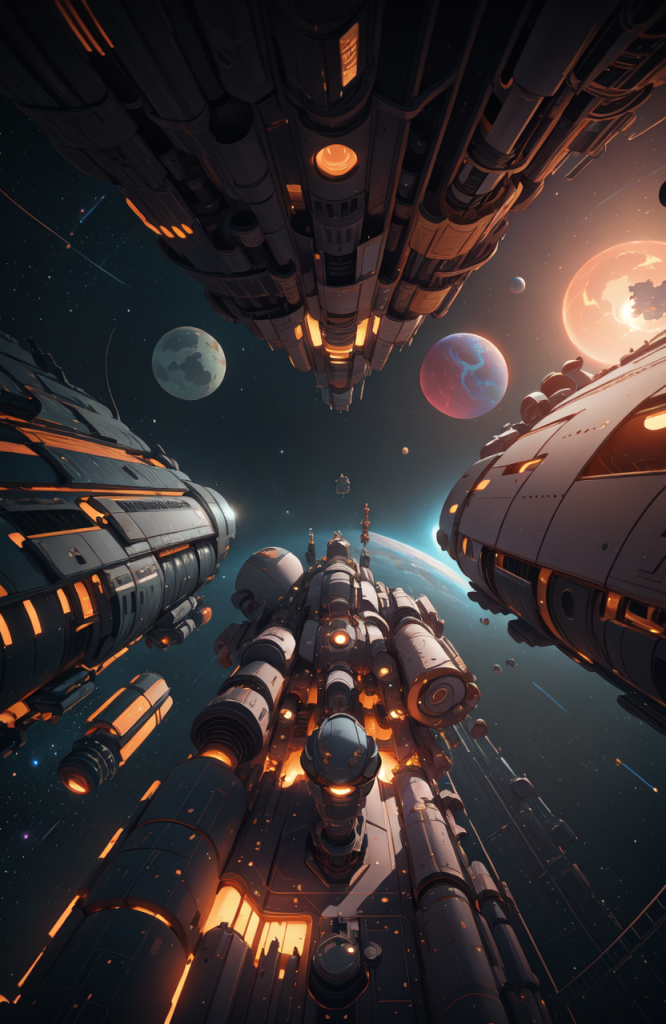
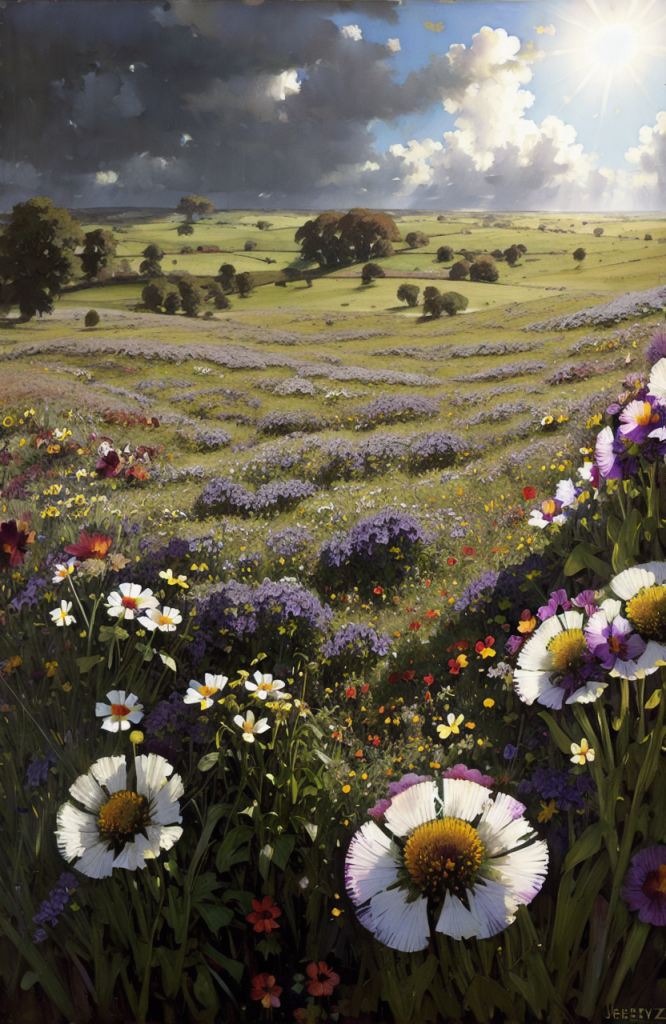
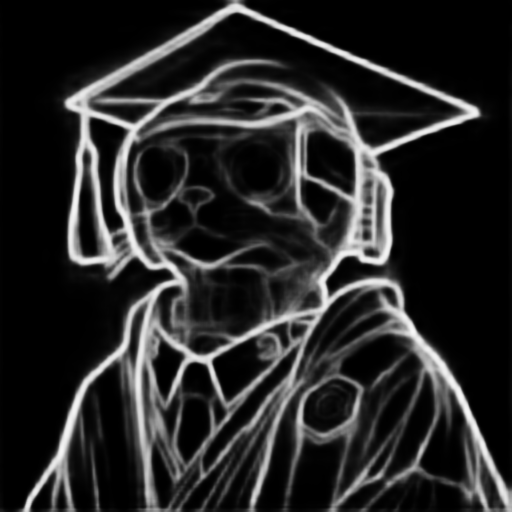
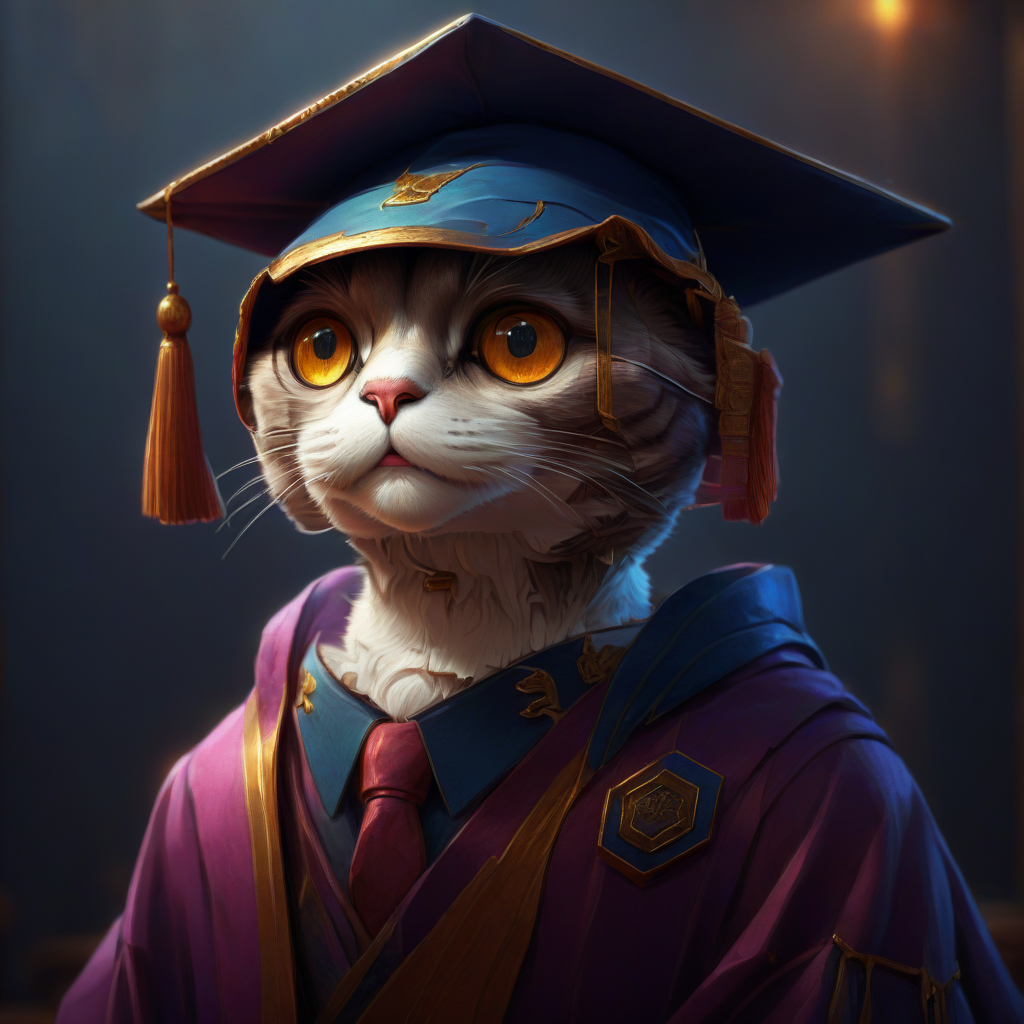
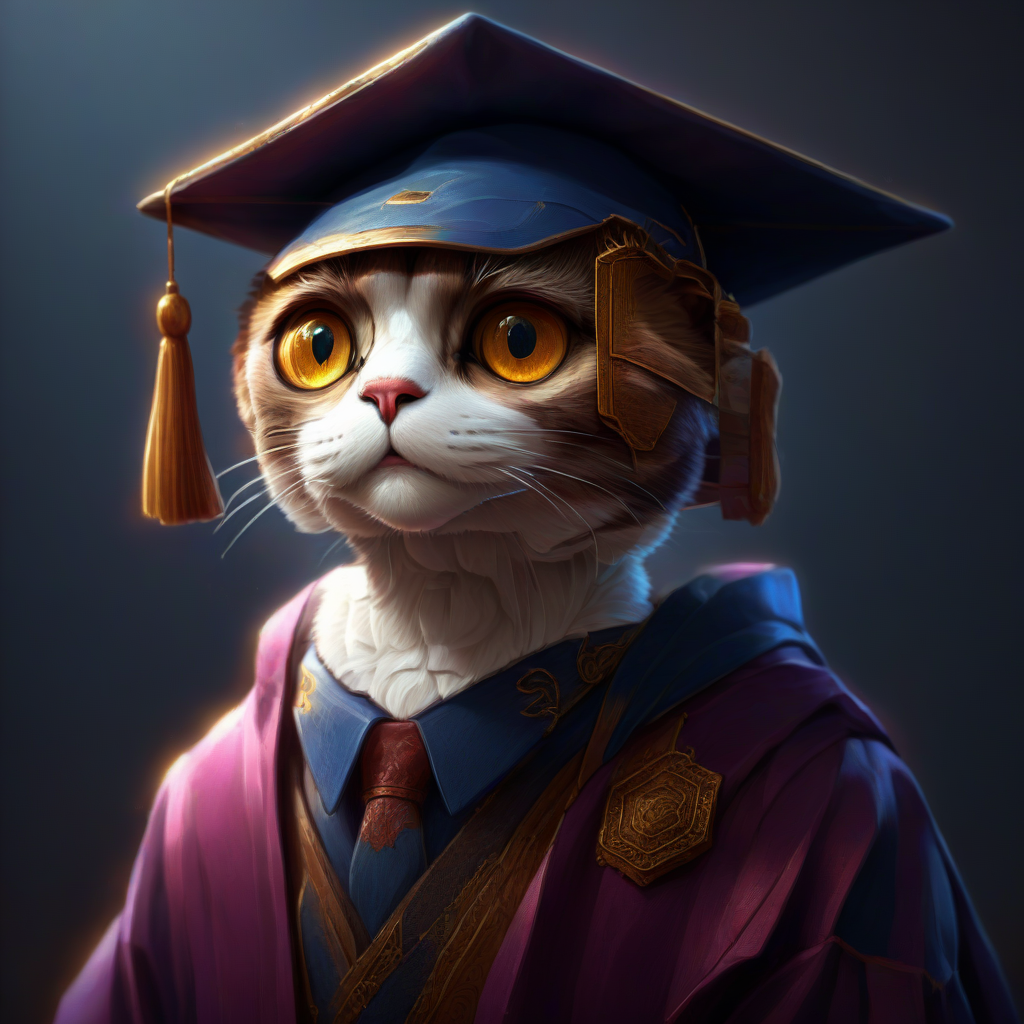
ControlNet is best described with example images. In the first example, we’re replicating the composition of an image, but changing the style and theme, using a ControlNet model called Canny. The top left image is the original output from SD.
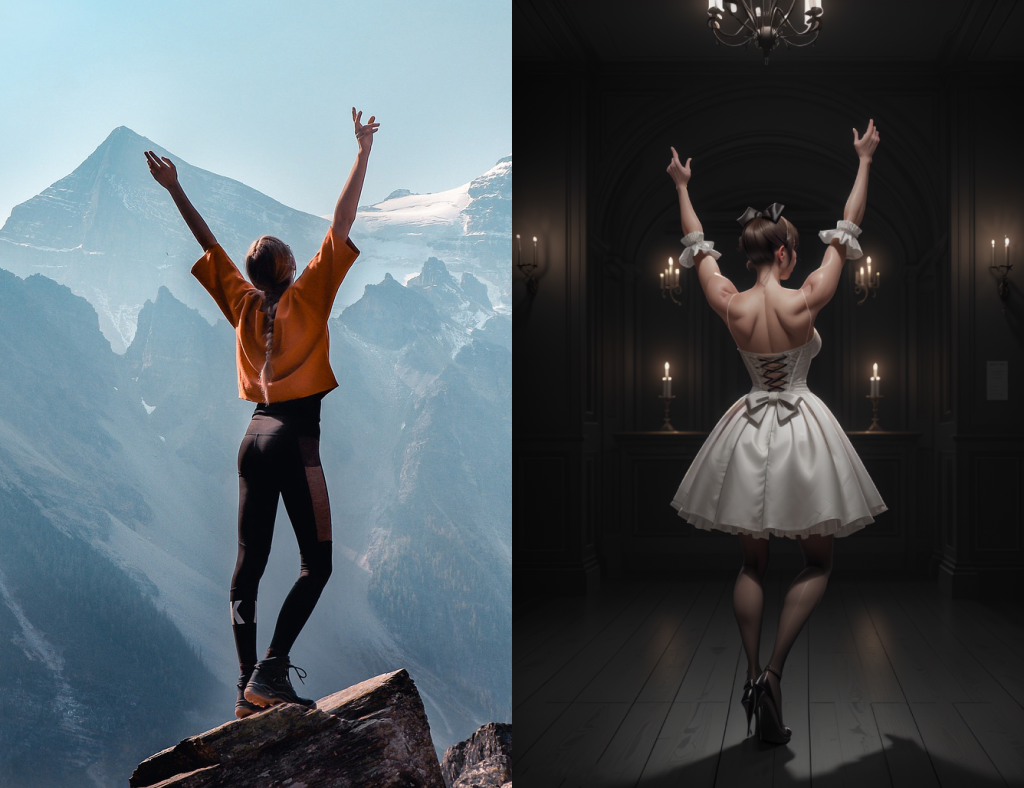
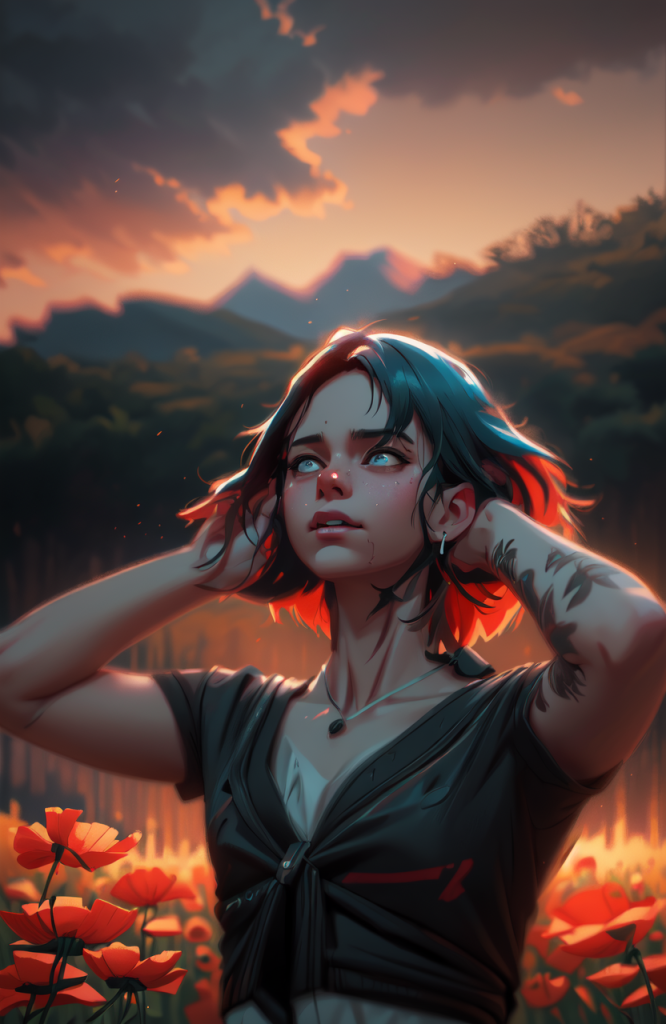
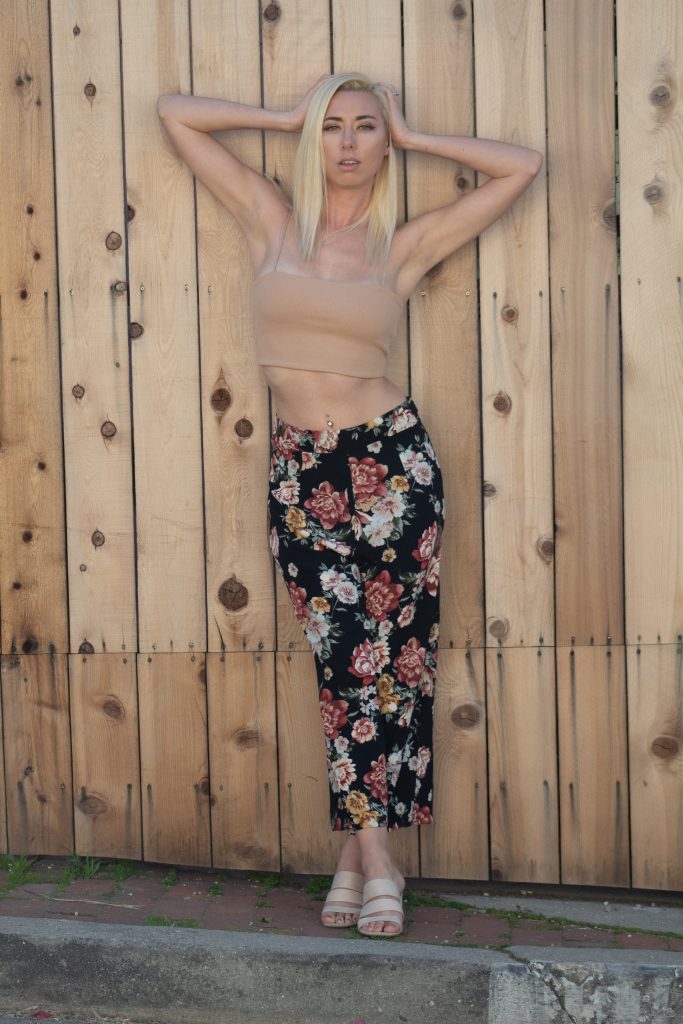
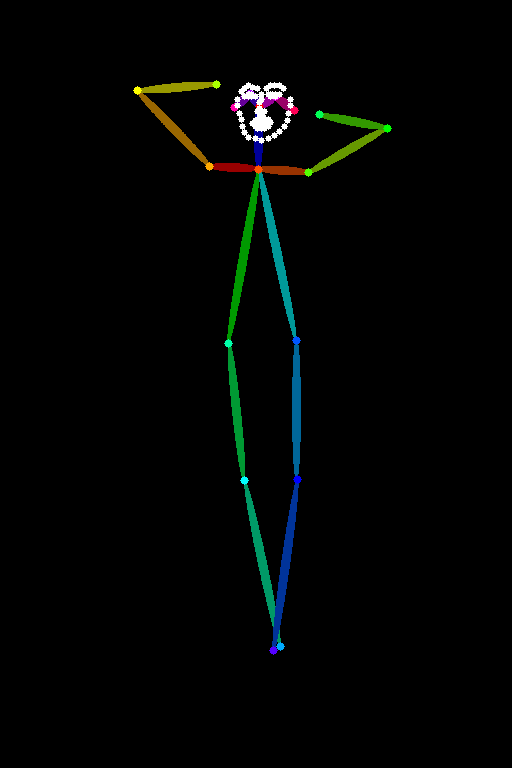
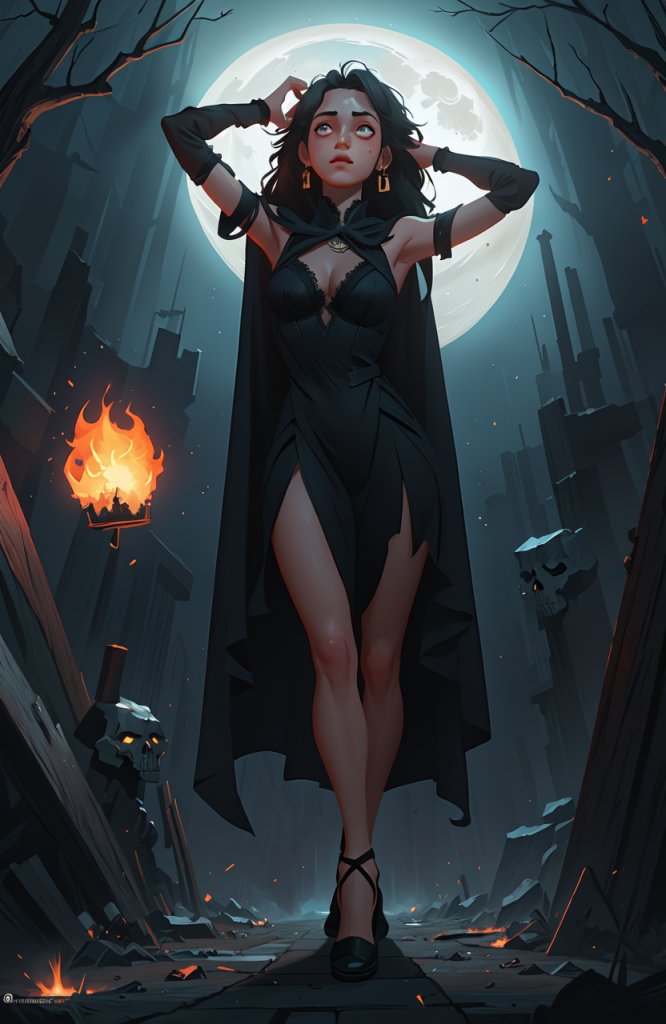
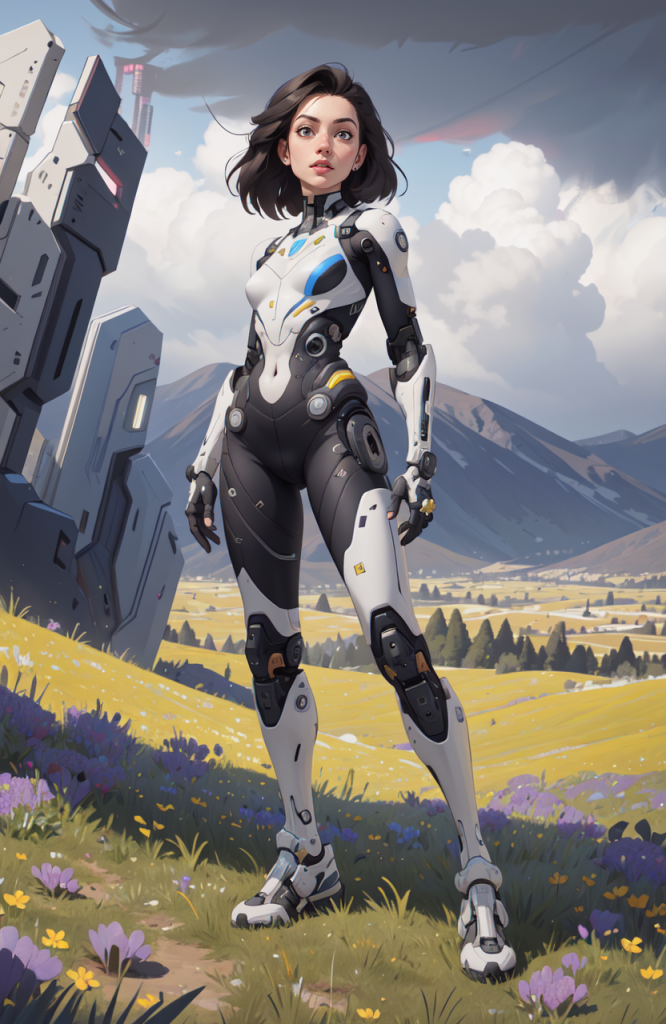
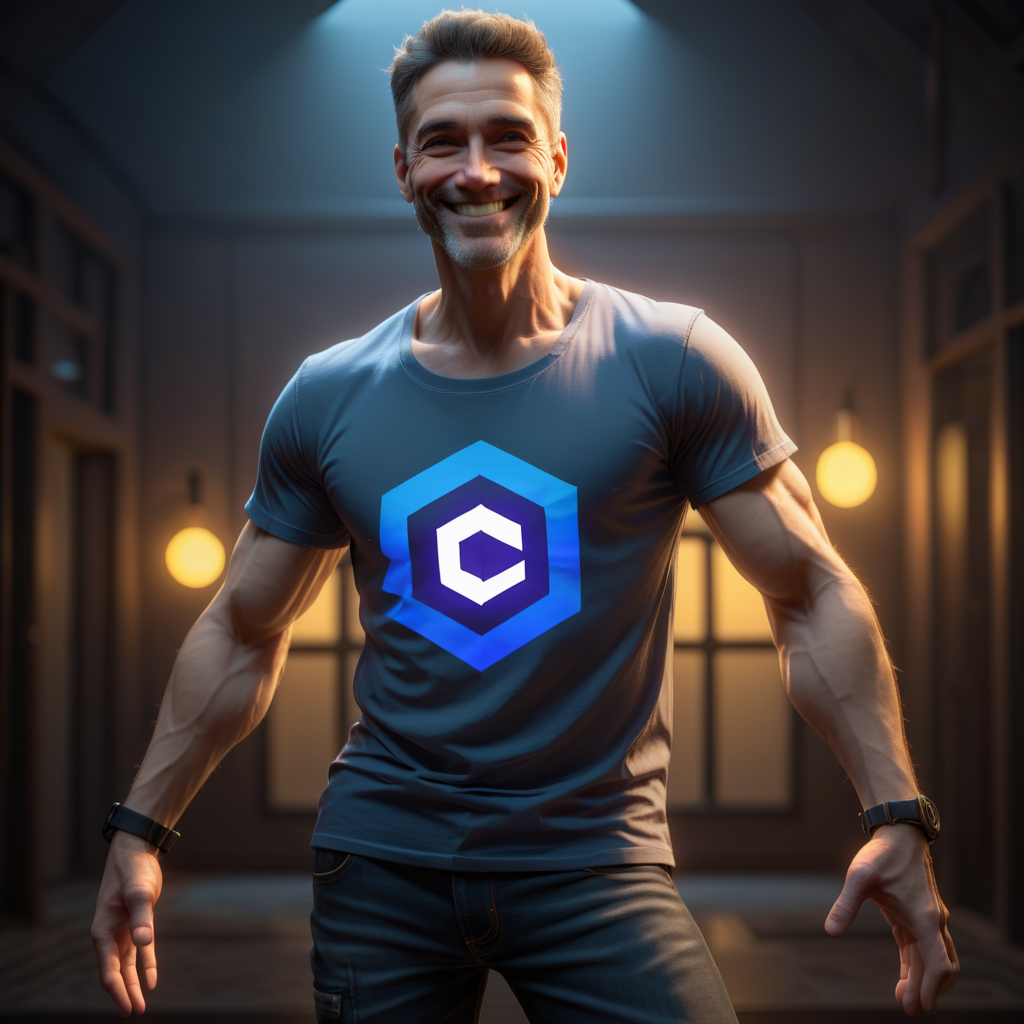
The second example uses a model called OpenPose to extract a character’s pose from an input image (in this case a real photograph), duplicating the position of the body, arms, head, appendages, etc. in the generated image. The input image can be a photograph, or a generated image – anything in which a human body can be detected.
The ControlNet Models
There are ControlNet models for SD 1.5, SD 2.X, and SDXL. There have been a few versions of SD 1.5 ControlNet models – we’re only listing the latest 1.1 versions for SD 1.5 for download, below, along with the most recent SDXL models.
Note that many developers have released ControlNet models – the models below may not be an exhaustive list of every model available!
Also note that many ControlNet models require additional .yaml configuration files to be placed in the same directory as the model. On Civitai, check the “Files” section while downloading to see if a config file is available.
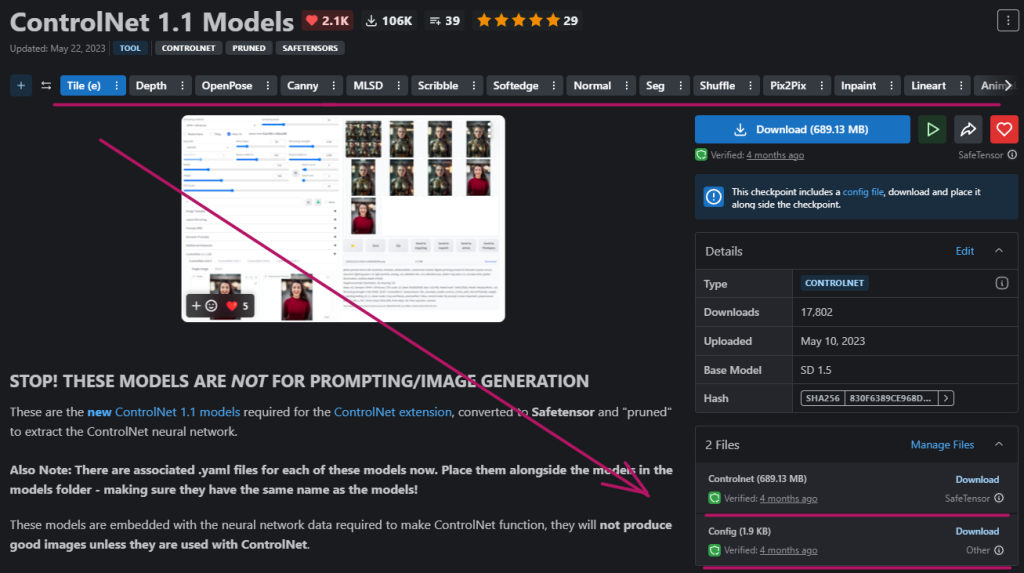
Illyasviel ControlNet 1.1 Models for SD 1.5 – Civitai Model Page
| Model | Download Link (Civitai) |
| Canny | ControlNet 1.1 Models – Canny |
| Depth | ControlNet 1.1 Models – Depth |
| HED/SoftEdge | ControlNet 1.1 Models – Softedge |
| Normal | ControlNet 1.1 Models – Normal |
| Scribble | ControlNet 1.1 Models – Scribble |
| MLSD | ControlNet 1.1 Models – MLSD |
| OpenPose | ControlNet 1.1 Models – OpenPose |
| Seg | ControlNet 1.1 Models – Seg |
| Inpaint | ControlNet 1.1 Models – Inpaint |
| ip2p | ControlNet 1.1 Models – Pix2Pix |
| Lineart | ControlNet 1.1 Models – Lineart |
| lineart anime | ControlNet 1.1 Models – AnimeLine |
| Shuffle | ControlNet 1.1 Models – Shuffle |
| Tile | ControlNet 1.1 Models – Tile (e) |
TencentARC T2I Adapter Models for SD 1.5 – Civitai Model Page
| Model | Download Link (Civitai) |
| Color | ControlNet T2I – Color |
| Style | ControlNet T2I – Style |
| Sketch | ControlNet T2I – Sketch |
| OpenPose | ControlNet T2I – OpenPose |
| KeyPose | ControlNet T2I – KeyPose |
| Depth | ControlNet T2I – Depth |
| Canny | ControlNet T2I – Canny |
| BodyPose | ControlNet T2I – BodyPose |
| Seg | ControlNet T2I – Seg |
SDXL Models – Various Developers – Civitai Model Page
What do the Models do?
Many of the models above are “duplicates”, in that there are multiple models which perform much the same task, but produce slightly different outputs, being trained to perform the task with slightly different training parameters. The list below gives one example from each of the popular model types.
You really have to try them out for yourself to see if you prefer Stability.ai’s Depth vs Kohya’s Depth, for example. There’s a lot of personal preference involved.
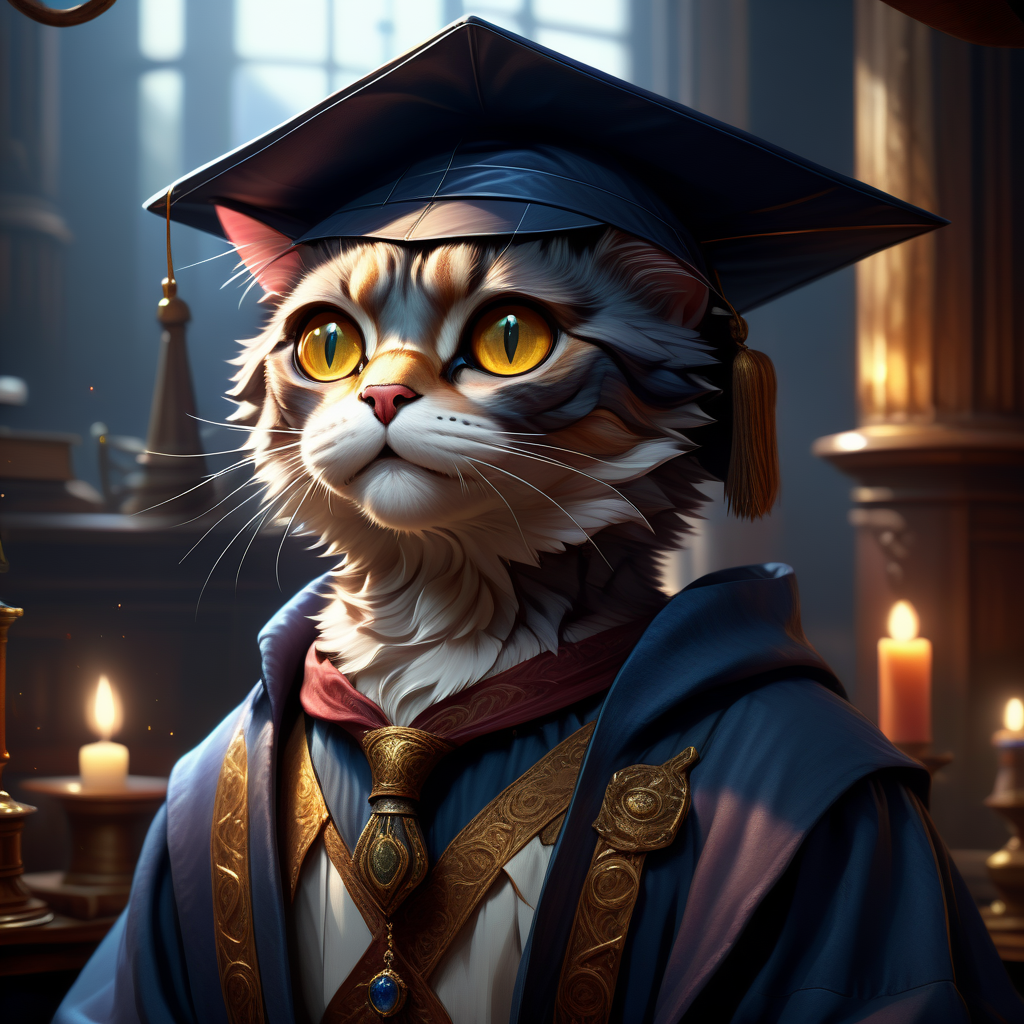
The Preprocessor (also called the Annotator) is what converts your uploaded image into a detectmap (examples below), which is fed into ControlNet to produce the output effect. The Preprocessor does not need to be set if uploading a pre-made detectmap, if you created an OpenPose skeleton manually, for example.
A number of the most popular models are demonstrated below.
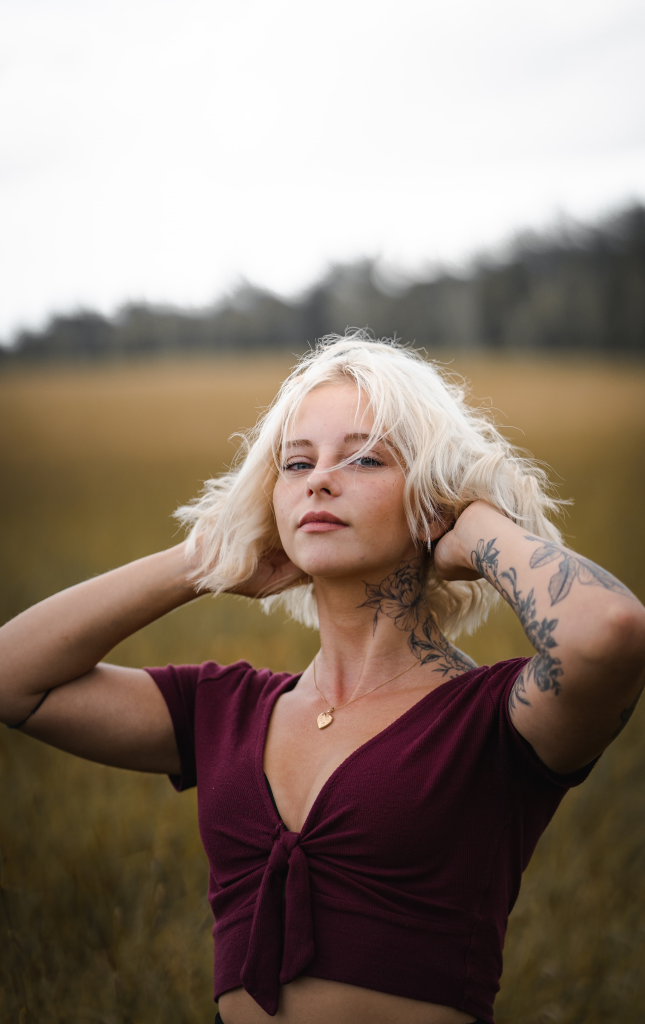
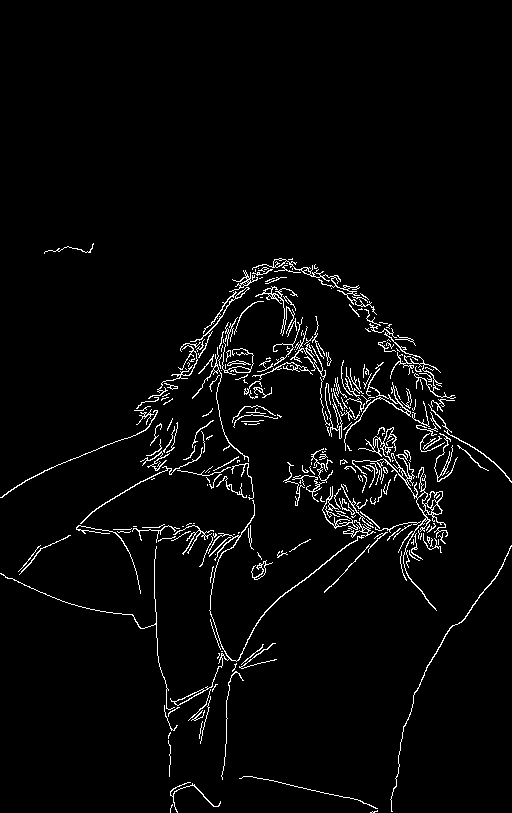
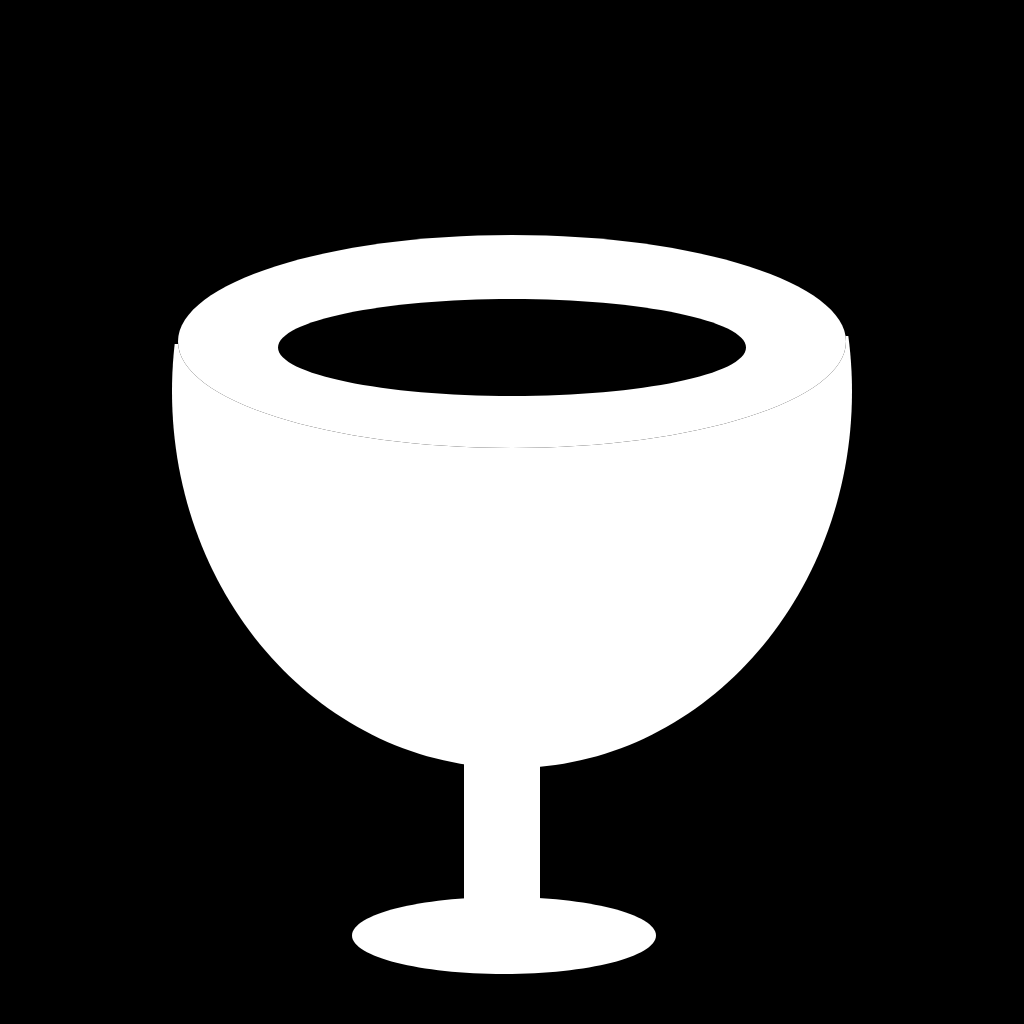
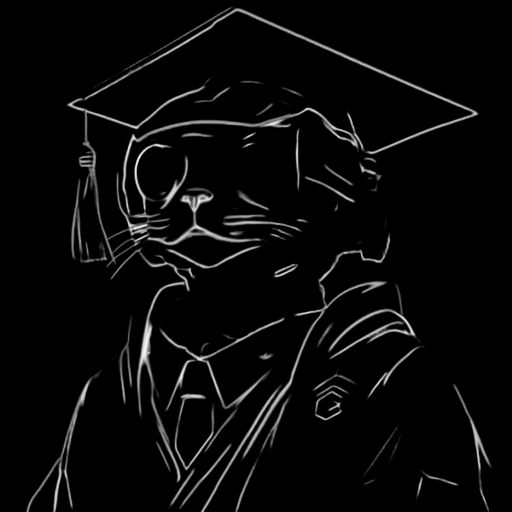
Canny – Edge Detection
Canny creates simple sharp lines around areas of high/low contrast;
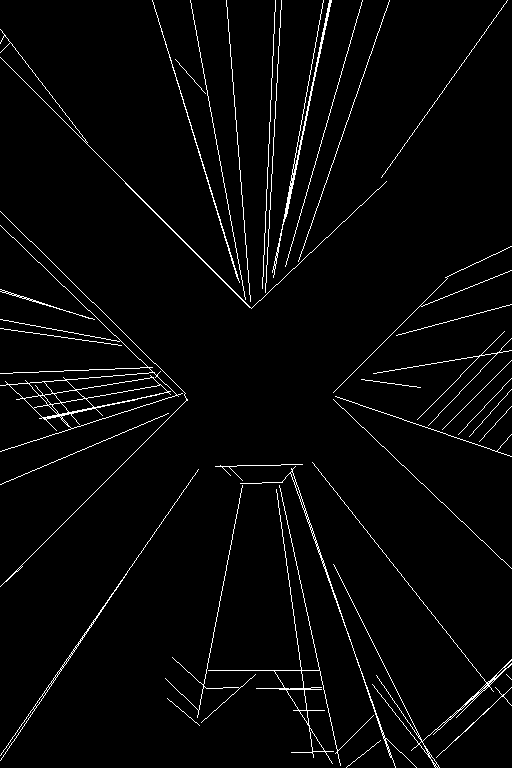
MLSD – Mobile Line Segment Detection
Straight Line Detection model for architecture and man-made objects;
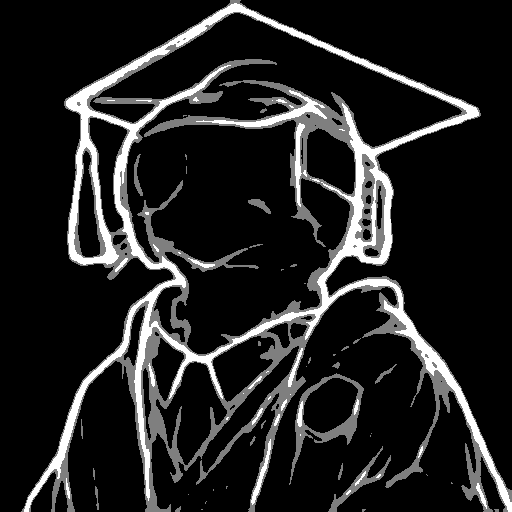
HED – Holistically-Nested Edge Detection (Also SoftEdge)
Creates smooth lines around objects, especially useful for recoloring and stylizing, using soft-edge detection.


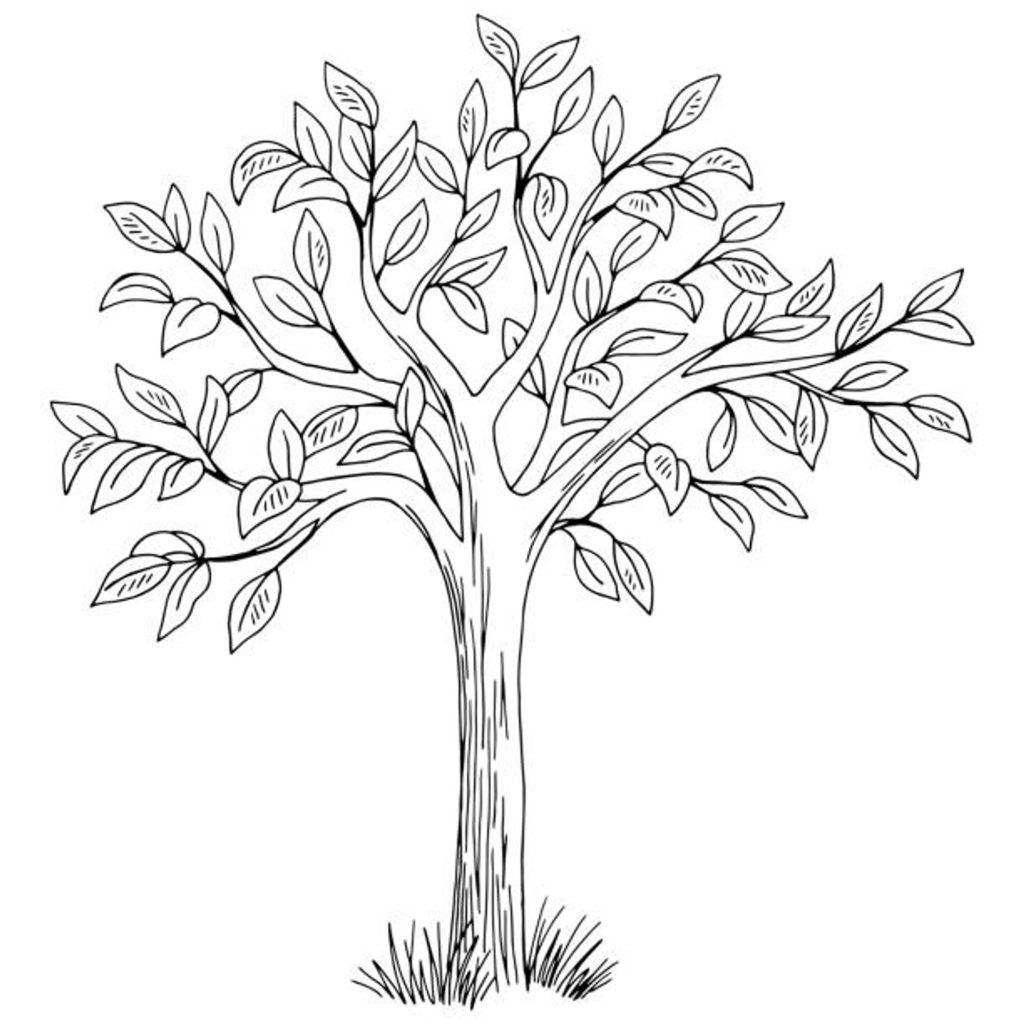
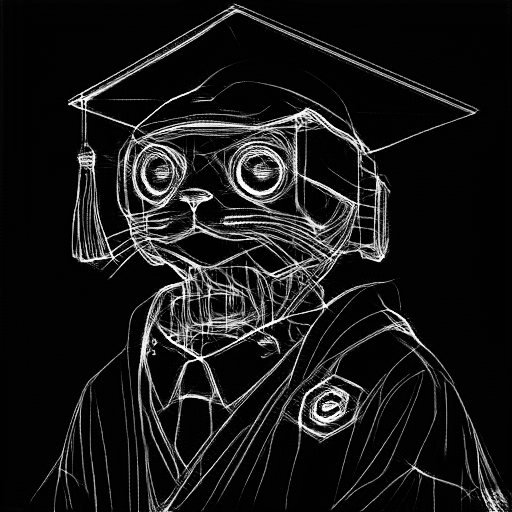
Scribble/Sketch
Converts sketches and other line-drawn art to images.


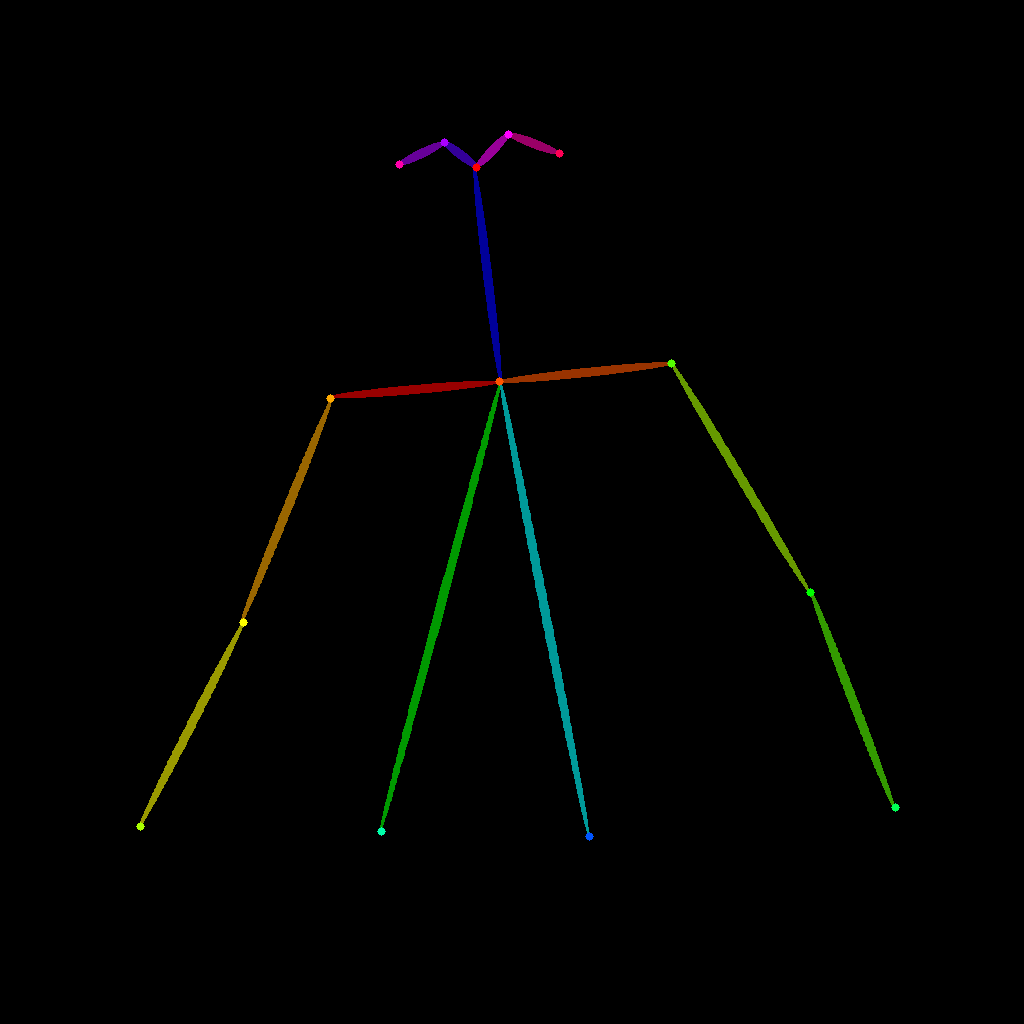
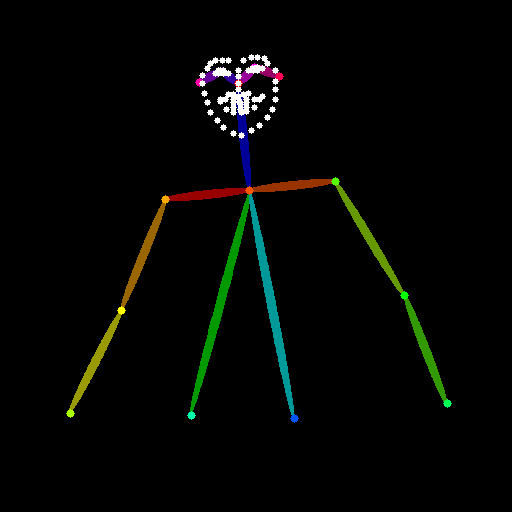
OpenPose (and Derivatives, OpenPose v2, BodyPose, etc.)
OpenPose will detect a human pose and apply it to a subject in your image. It creates a “skeleton” with a head, trunk, and limbs, and can even include hands (with fingers) and facial orientation. Multiple OpenPose Skeletons can be combined to create dynamic crowd scenes;
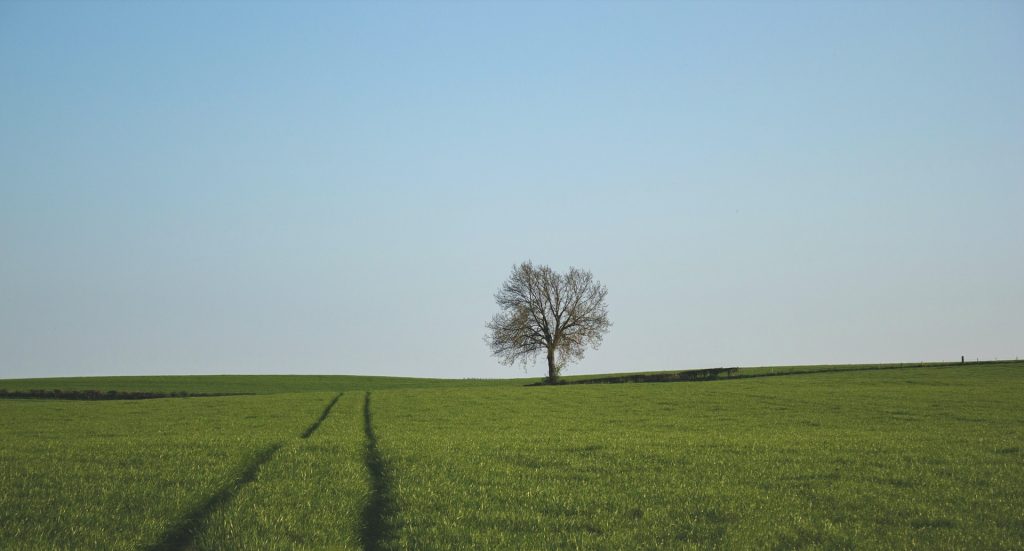
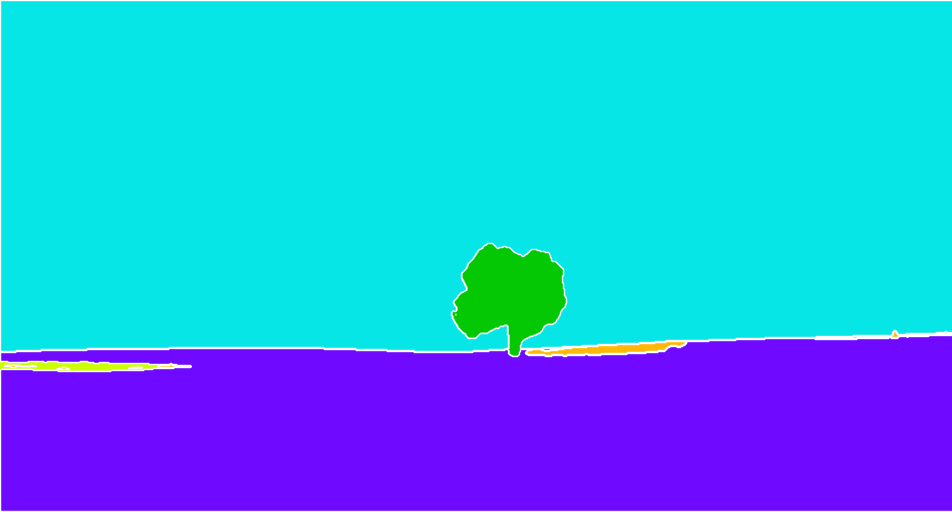
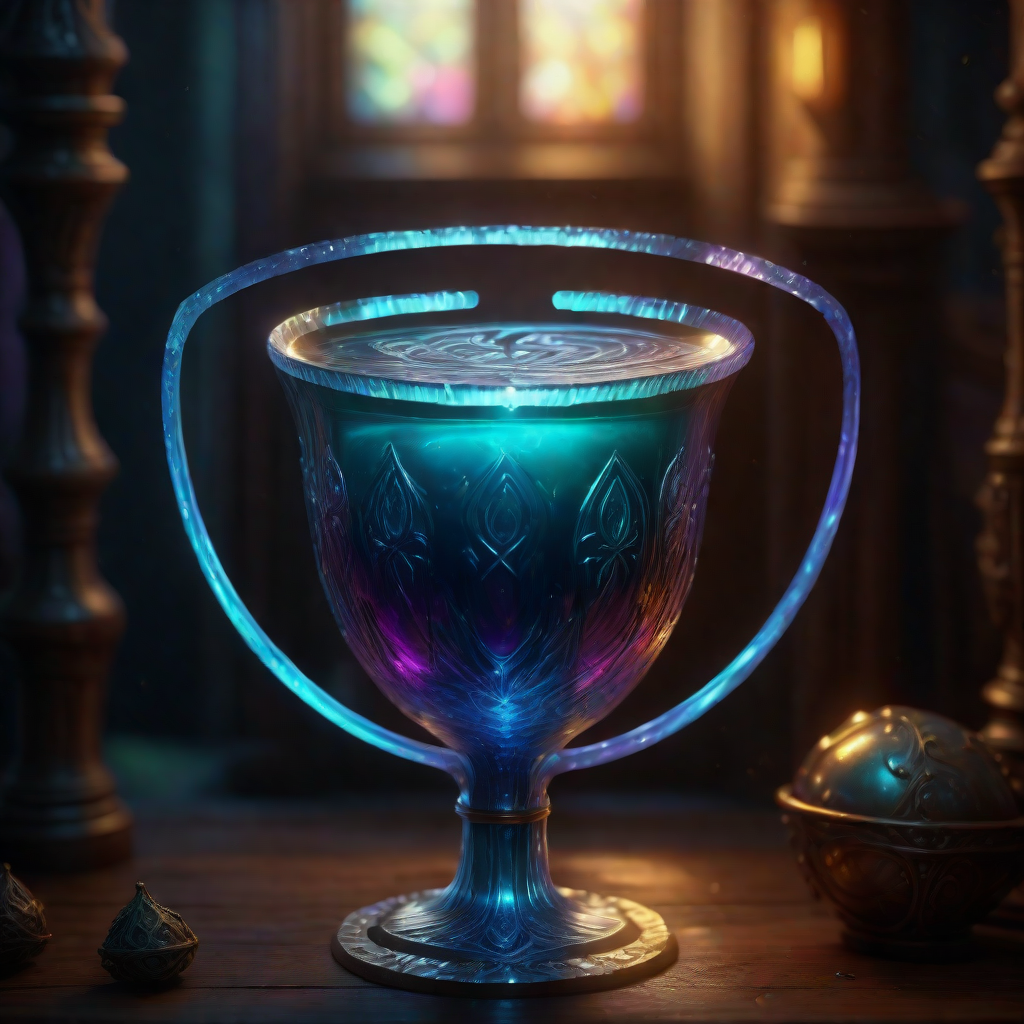
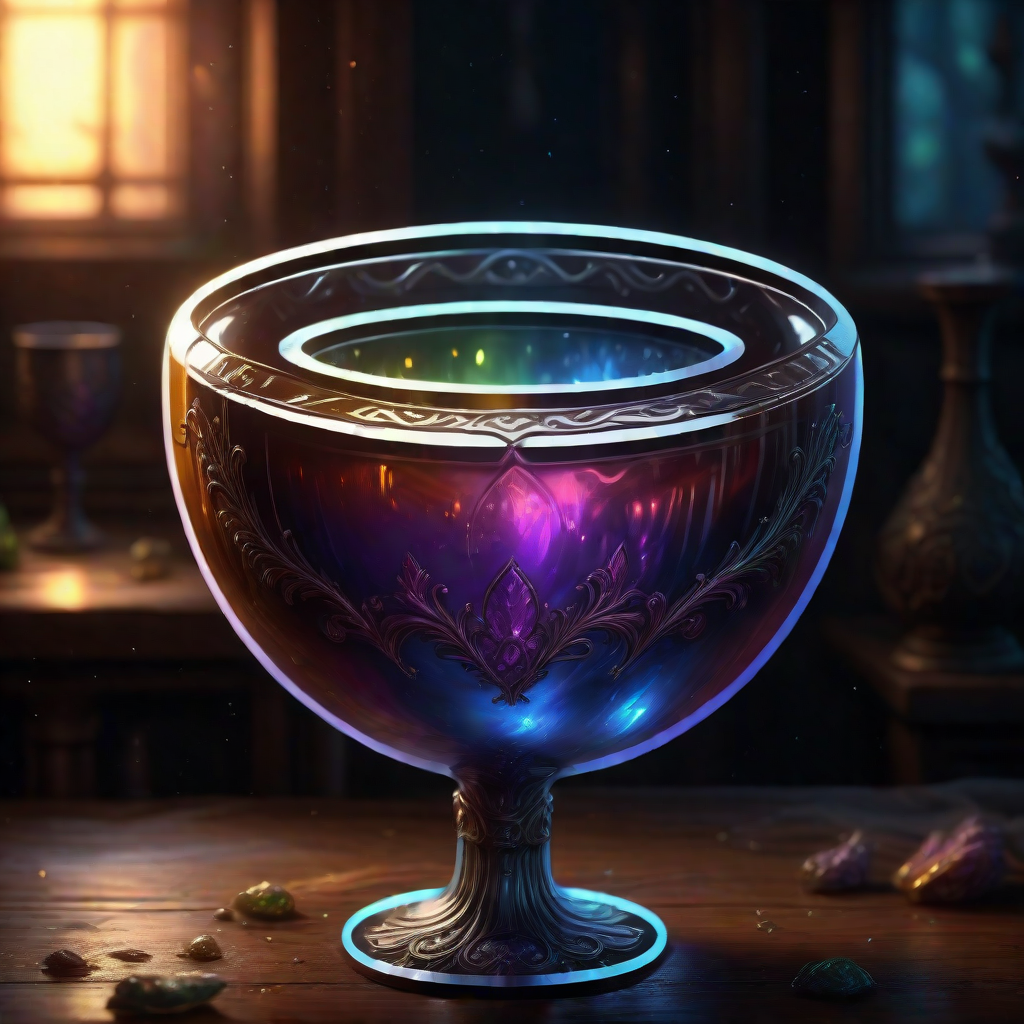
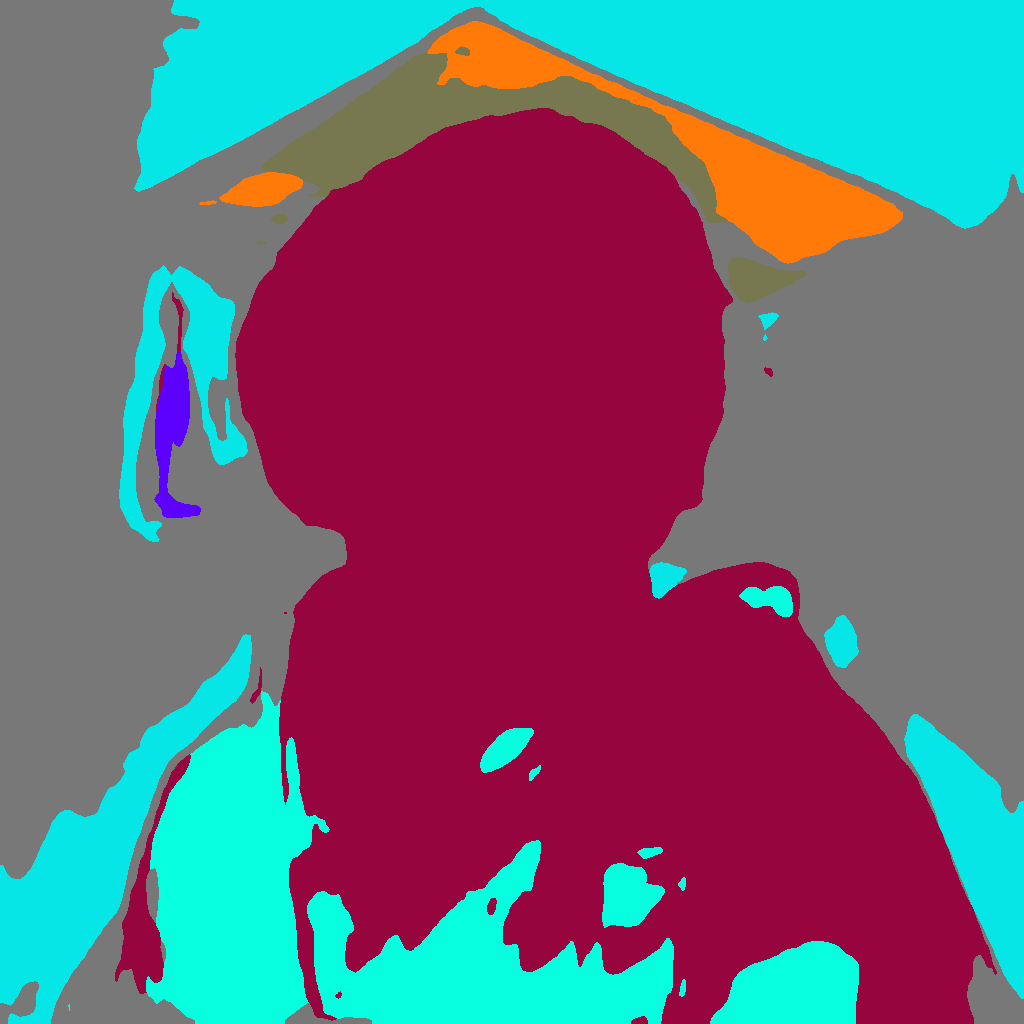
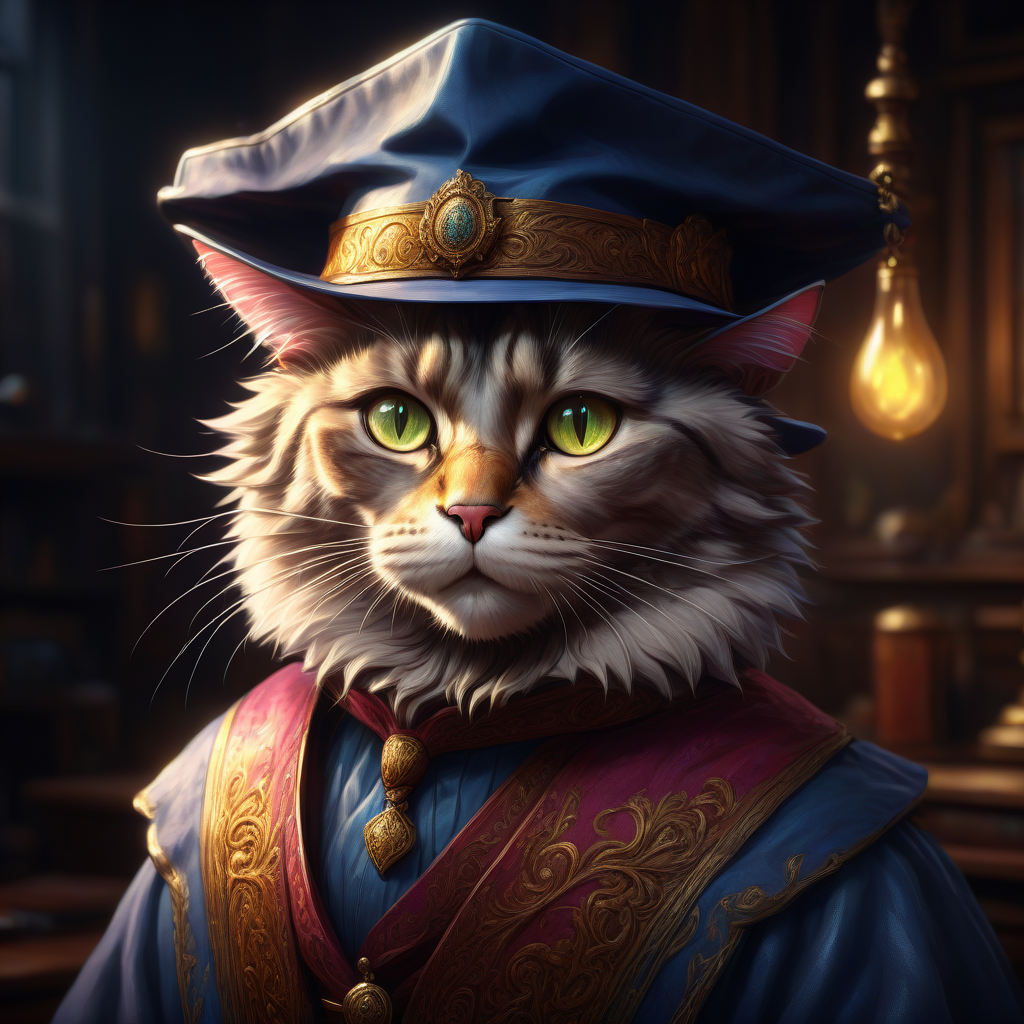
SEG – Semantic Segmentation
SEG detects, and segments, parts of images based on color and shape;

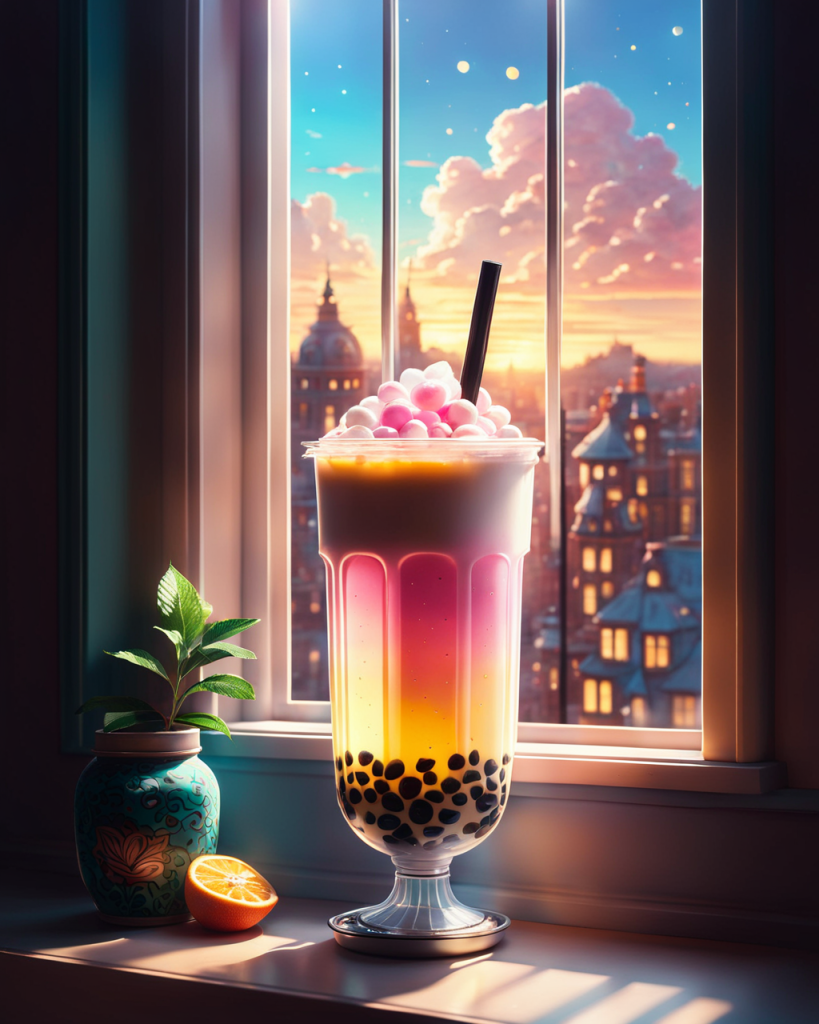
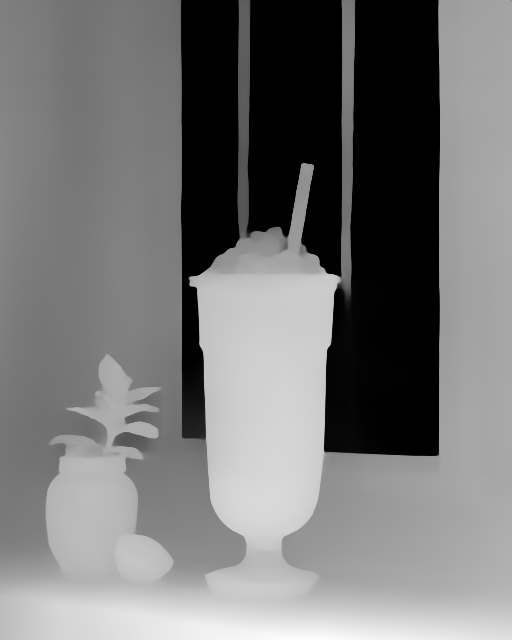
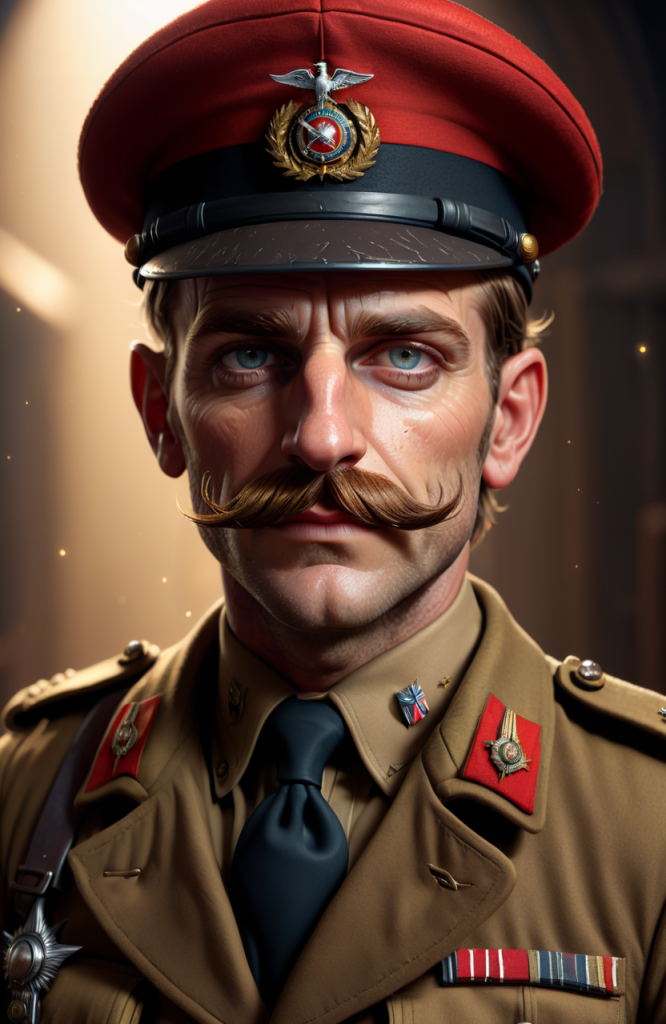
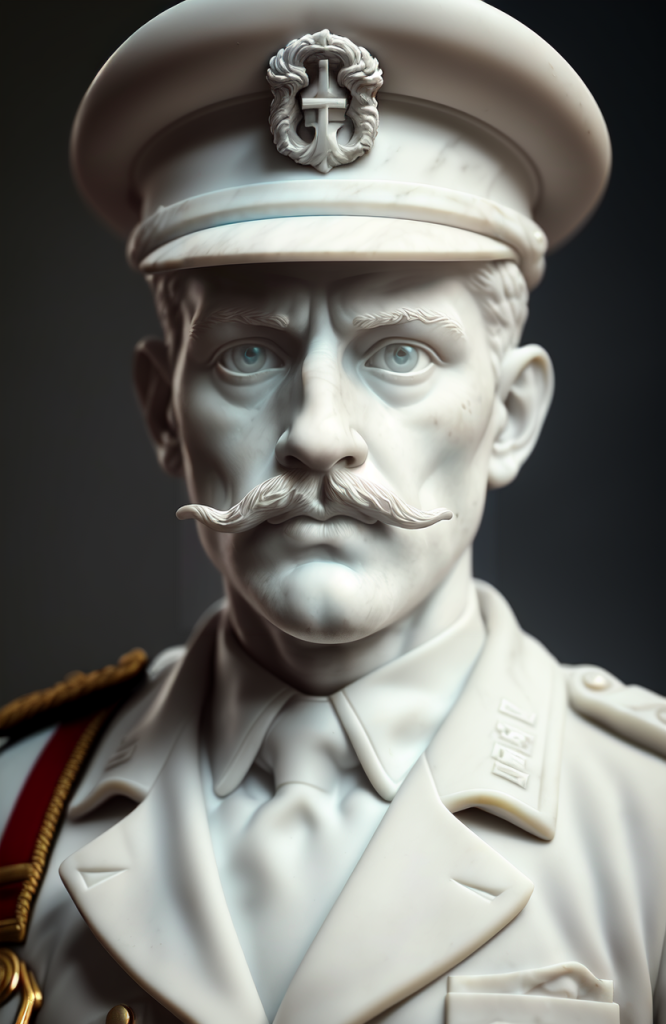
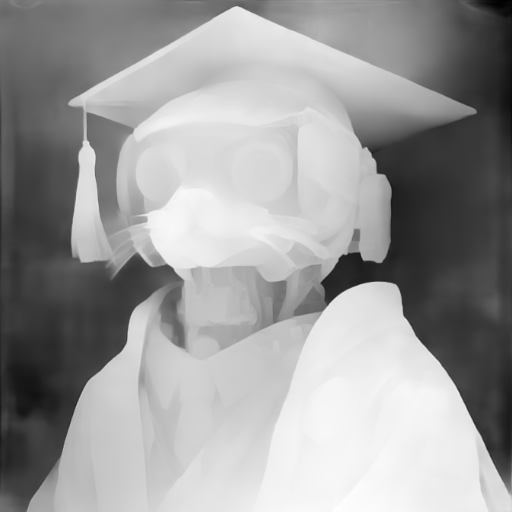
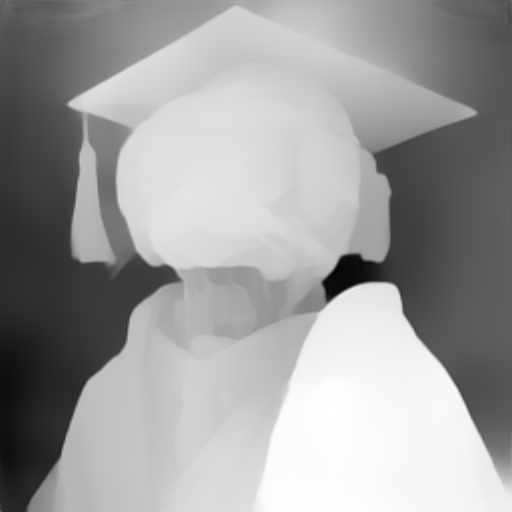
Depth
Replace or re-draw the subject (or parts of an image), based on greyscale depth maps;

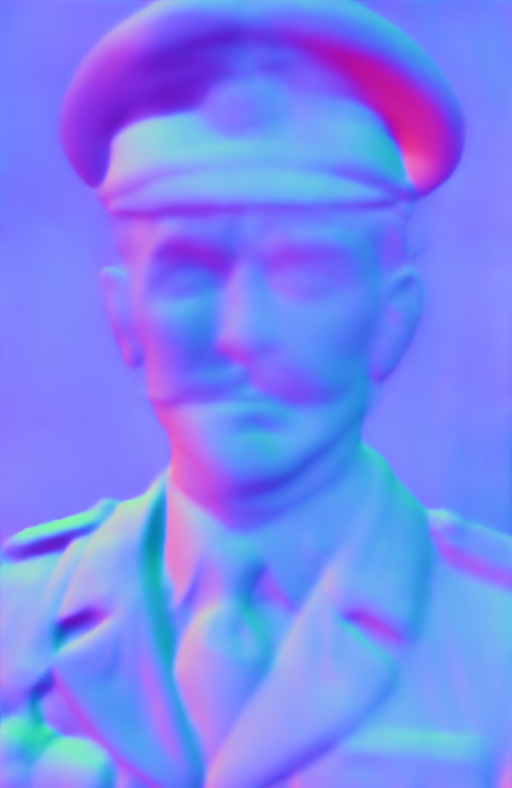
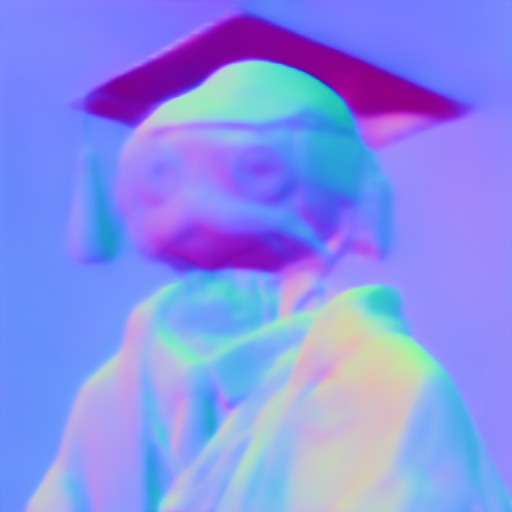
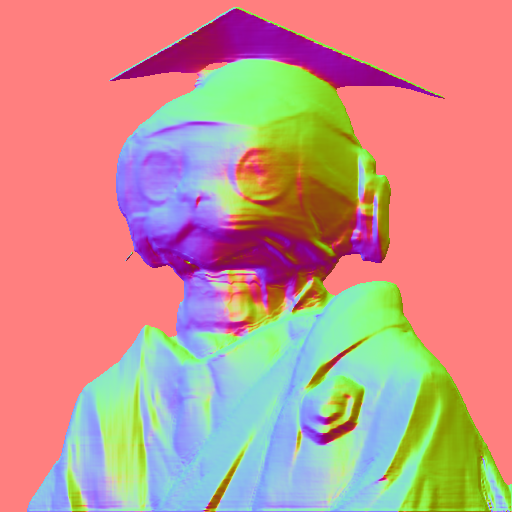
Normal Map
Normal Maps are somewhat similar to Depth Maps, but retain minor surface details and geometry;
Color
Produces a color swatch/palette based on the input image, which is then applied to the prompted image;

Style
Transfer the theme, style, or certain elements of an image into your generated image, without mentioning them in the prompt. Note that this Model uses the clip_vision preprocessor (more on Preprocessor types below) and does not produce a Detectmap. Also note that to function, this Model requires prompts to be under 75 tokens long.
Installing ControlNet & The Models
Automatic1111
Installing ControlNet for Automatic1111 is extremely straightforward; no different than installing any other extension. Make sure your Automatic1111 installation is up to date, then head to the Extensions tab.
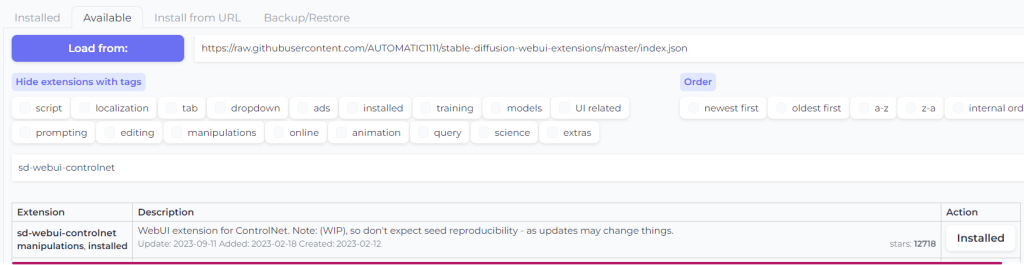
Search for sd-webui-controlnet, and look for the Extension highlighted above – it’s easy to find as it has over 12,000 stars on Github. If you’re having trouble finding it, you can Order the list by Stars, and it will jump to the top of the list.
Once you’ve installed the Extension and restarted the WebUI Console, you’ll need to download the models (links above) into the ControlNet models directory. By default, you’ll find that directory at;
stable-diffusion-webui\extensions\sd-webui-controlnet\models
We can also configure custom save directories for both the ControlNet models, and Preprocessor models (more details below!), by looking in the WebUI Settings > ControlNet Options.

ComfyUI
ComfyUI has native out-the-box support for ControlNet; no third-party extensions are required. ControlNet models should be downloaded and placed in the following directory;
ComfyUI\models\controlnet
Using ControlNet (Automatic1111 WebUI)
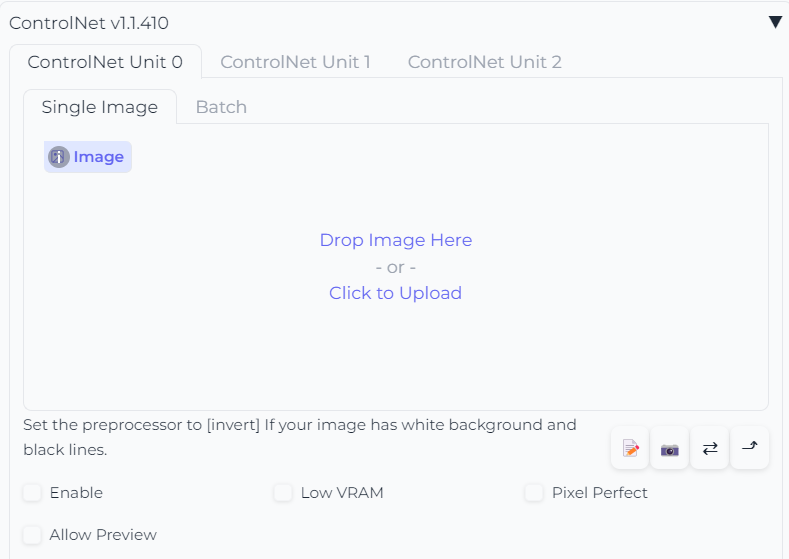
Once installed to Automatic1111 WebUI ControlNet will appear in the accordion menu below the Prompt and Image Configuration Settings as a collapsed drawer. It will show the version number of the currently installed version. ControlNet is one of the most frequently updated extensions, with new features being added (and broken!) on an almost weekly basis, so it’s extremely useful to know, at-a-glance, which version is installed.
The ControlNet interface appears for use in both text2img and img2img modes.
ControlNet Options
The ControlNet interface can appear intimidating at first glance, but we’ll step through all the options and explain what each does, and the choices will be demystified in no time! From top to bottom;
| Interface Option | Function |
|---|---|
| The Image Box | This is where we drop (or upload) our Source Image – the image which we want to extract some trait from, to pass to the new image to be generated. |
| Enable | Turns the ControlNet instance on/off |
| Low VRAM | Checking this option allows ControlNet to function with less than 6GB of VRAM, at the expense of processing speed. |
| Pixel Perfect | When checked, automatically calculates the correct Preprocessor resolution for the input image (more details below!) |
| Allow Preview | When checked, will display the Preprocessor created Detectmap alongside the ControlNet input image – extremely useful to see exactly what the Preprocessor is doing. |
| Interface Option | Function |
|---|---|
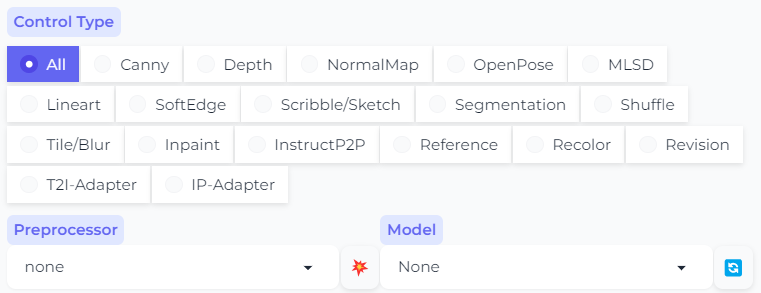
| Control Type | Selecting a Control Type radio button will attempt to automatically set the Preprocessor and Model appropriately, but if we want control over which Preprocessor to use with a given model, setting manually is best. |
| Preprocessor | A list of available Preprocessors (more details below!) |
| “Bang” button (Preview Annotator Result) | Clicking this button, once you’ve selected a Preprocessor, will run the Preprocessor against the input image, displaying a preview of the output. |
| Model | The ControlNet model we wish to use. Note that the Preprocessor and the Model should be set appropriately. The Depth Preprocessors work with the Depth Models, and so forth, although there is some overlap (more details below!) |
| Model Refresh Button | If ControlNet models have been downloaded while WebUI is running, there’s no need to restart – simply click this button to refresh the Model list. |
| Interface Option | Function |
|---|---|
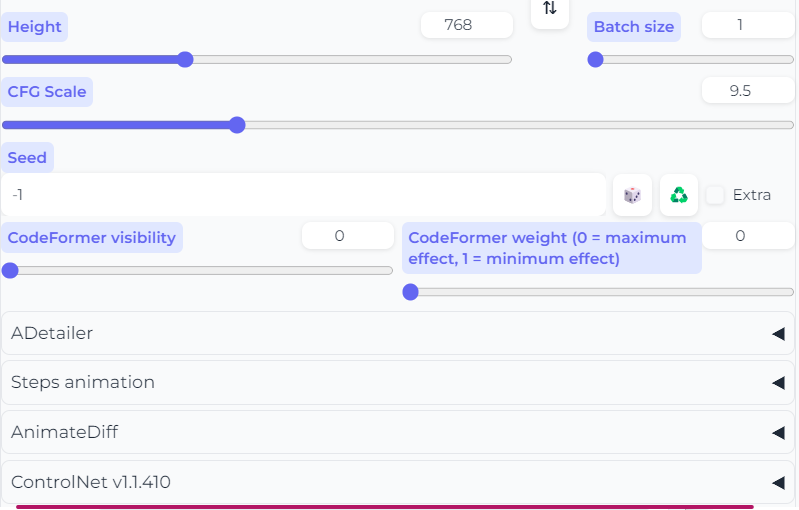
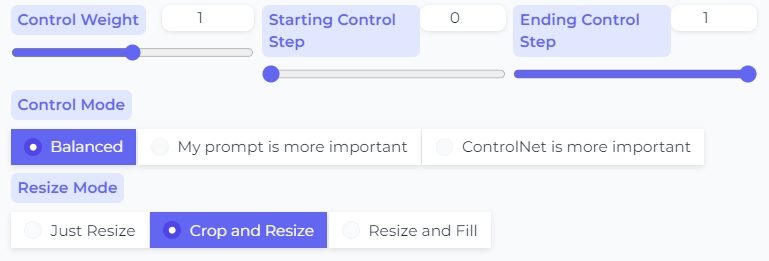
| Control Weight | How much emphasis to apply to the ControlNet image when generating the final output. |
| Starting Control Step | Rather than applying ControlNet to every Step of image generation, this allows us to start the application of ControlNet at a predefined Step of the image generation process. |
| Ending Control Step | This allows us to define at which Step ControlNet should stop applying, during image generation. |
Below these we have the options for Control Mode. Control Mode was previously called “Guess Mode” in older ControlNet versions.
| Interface Option | Function |
|---|---|
| Control Mode – Balanced | Balanced strikes balance between the input prompt and ControlNet. Puts ControlNet on both sides of the GFG scale. The same as having Guess Mode disabled in the old ControlNet. |
| My prompt is more important | Uses progressively reduced U-Net injections of ControlNet to ensure that your prompt is given more influence over the image generation. |
| ControlNet is more important | Puts ControlNet only on the Conditional Side. This means that ControlNet will be made N times stronger, based on your CFG setting! If your CFG Scale is set to 7, ControlNet will be injected at 7 times the strength. Note that this setting is distinct from Control Weight. Using this setting gives ControlNet more leeway to guess what is missing from the prompt, in generating the final image. |
The next options are the Resize Modes. Resize modes tell ControlNet how to handle input images of different dimensions than those of the txt2img settings.
| Interface Option | Function |
|---|---|
| Just Resize | The ControlNet input image will be stretched (or compressed) to match the height and width of the text2img (or img2img) settings. This will alter the aspect ratio of the Detectmap. |
| Crop and Resize | The ControlNet Detectmap will be cropped and re-scaled to fit inside the height and width of the txt2img settings. The Default setting, and the most useful. |
| Resize and Fill | Fits the Detectmap into the text2img canvas settings, and extends the Detectmap with “emptiness” to fill any spaces. |
The last settings allow us to perform a Loopback, and set ControlNet Presets;
| Interface Option | Function |
|---|---|
| Loopback | Passes the generated image back into ControlNet for a second pass! |
| Presets | Gives the ability to save and reload ControlNet settings as Presets. |
Additionally, there are some buttons below the Input Image which perform some specialized functions;
| Interface Button | Function |
|---|---|
| ? | Creates a new Canvas (see below) |
| ? | Enable your webcam! Take selfies and apply them as the ControlNet input image. |
| ? | Flip webcam horizontal orientation |
| ?? | Send Dimension button – duplicates the dimensions from the ControlNet input image to the txt2img (or img2img) Width and Height. |
Other ControlNet Options – Multiple ControlNet Instances
We have the ability to enable up to 10 (!!) ControlNet instances (called “Units“), which we can chain together to produce phenomenal results. Each instance will be displayed as a tab, nested under the ControlNet drawer.

To enable multiple Instances/Units, open the WebUI Settings for ControlNet, and use the Multi ControlNet slider to specify how many Instances/Units to enable in the interface.

Preprocessors (Annotators)
Preprocessors (also called Annotators in the original ControlNet research paper), (often, but not always) correspond to a ControlNet model, and there are sometimes multiple Preprocessor choices for each model! The examples below show some of these Preprocessor outputs for each model type, using the same ControlNet input images, for consistency.

Note that the first time a Preprocessor is selected from the Preprocessor list and an image generated, it may seem like nothing is happening for an extended period. Upon the initial run of each Preprocessor, additional required files and models will be downloaded.
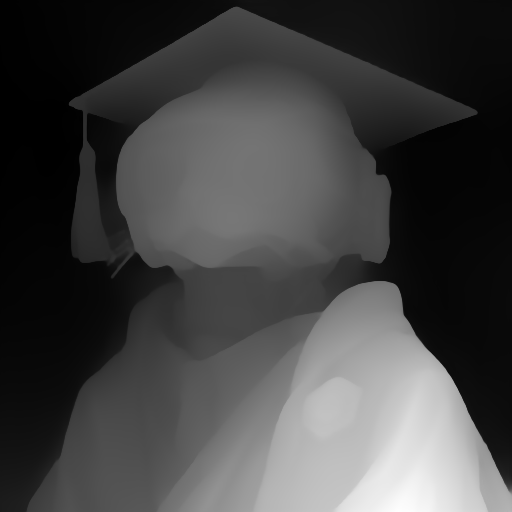
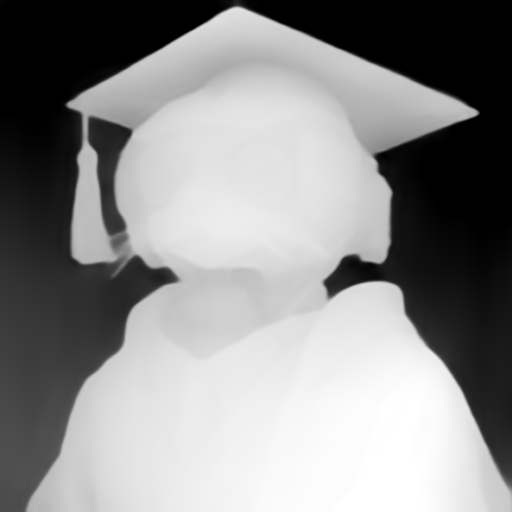
Depth
Depth provides four Preprocessors which produce varying gradients between high/low areas.


NormalMap
There are two NormalMap Preprocessors, picking up different layers of detail.
Output examples to follow.
OpenPose
There are four OpenPose Preprocessors, becoming progressively more detailed until featuring hand and finger posing, and facial orientation. Note that the base openpose Preprocessor only captures the “body” of a subject, and openpose_full is a combination of openpose + openpose hand (not shown) + openpose_face.
Output examples to follow.


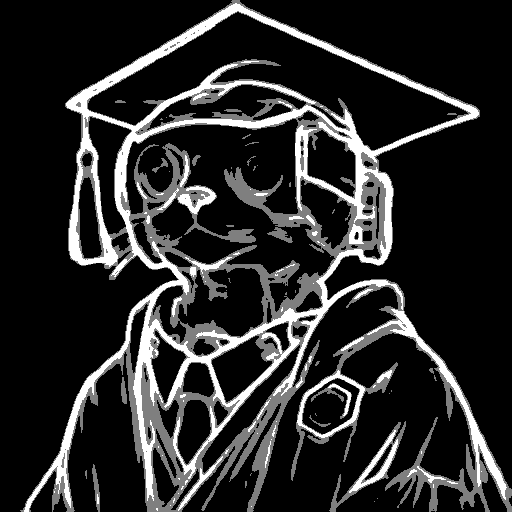
Lineart
Trained on line drawings, can generate rough or detailed lineart from input images, and can be used to translate lineart images into full color images.
Output examples to follow.
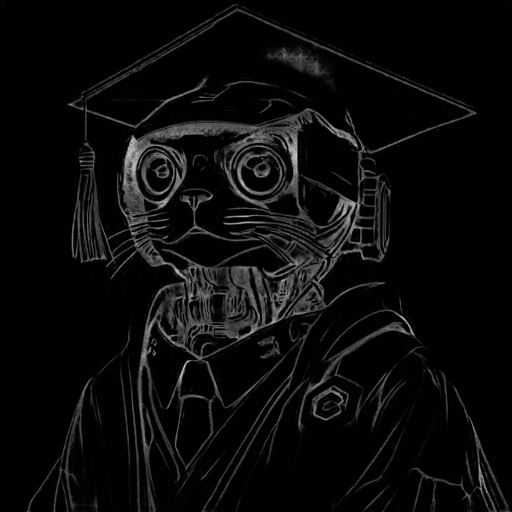
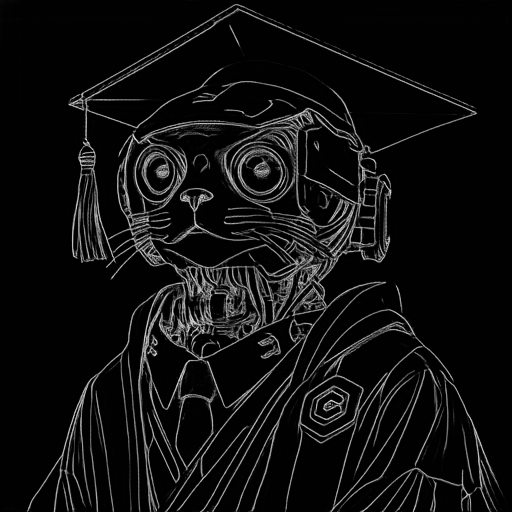
Softedge
Extremely versatile Preprocessor, great for capturing the outline and detail of many types of image.
When looking for best result quality, softedge_hed is the clear winner, followed by softedge_pidinet.


Scribble
Four Preprocessors, each capable of turning hand-drawn scribble drawings into images.


Segmentation
Three Preprocessors excelling in semantic segmentation.


Reference
The Preprocessor reference_only is an unusual type of Preprocessor which does not require any Control model, but guides diffusion directly using the source image as a reference.
This can be used to make images of a similar style, especially anime and cartoons!
Revision
Similar to the reference_only Preprocessor, revision_clipvision and revision_ignore_prompt use the ControlNet image as a source for the generation of image variations – no prompt needed!
Note that the revision_clipvision Preprocessor is 3.4GB in size.

Part II – Coming Soon!
Part I has just scratched the surface of ControlNet! We’ve looked at what it does, how to install it and where to get the models from. We’ve covered the settings and options in the interface, and we’ve explored some of the Preprocessor options.
Part II will look at;
- Real-world use-cases – how we can use ControlNet to level-up our generations.
- Using ControlNet with ComfyUI – the nodes, sample workflows.
- Companion Extensions, such as OpenPose 3D, which can be used to give us unparalleled control over subjects in our generations.
- ControlNet resources on Civitai.com